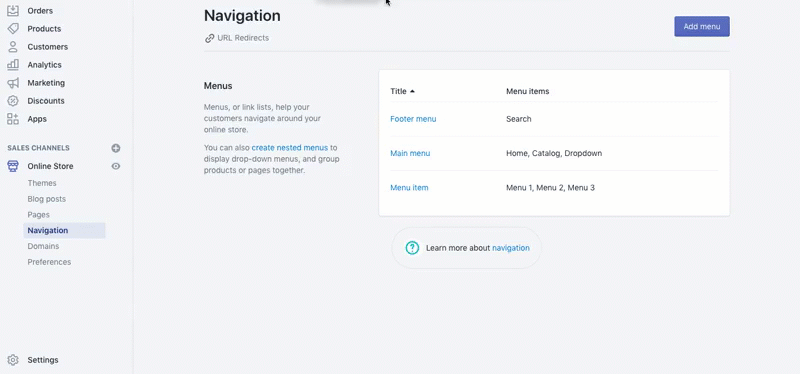
Setup Navigation
Version 3.0
Shopify already has a great tutorial regarding building the basics of store navigation here. If you happen to have no prior knowledge about website navigation, please visit their tutorial first to have a grasp of the upcoming tutorials.
Understanding navigation
Before you begin, we will cover the basic knowledge about Arena Mega Navigation 3.0 and compare the way that navigation looks in different themes & default drop-down menu.
Features
With a full grid system built in and individual layout controls for each menu item, it’s easier than ever to build gorgeous mega menu layouts that are
- Fully Responsive
- Mega or Dropdown-Flyout Submenus
- Compatible with mobile devices, including iPhone, iPad, and Android
- Touch-enabled
- Advanced submenu layouts with the built-in Bootstrap column grid system
Navigation Component
Depending on the theme design, the components usually seperate into:
- Main Menu: The main menu is usually displayed as items across the width of the header (Horizontal). This is visible on most devices depending on the themes. Nowadays this menu is usually hidden in a hamburger side bar to the left or right on mobile view.
- Verticle Main Menu: The verticle main menu is usually displayed as a list of items in a homepage sidebar (Verticle). This is mostly visible on desktop and tablet.
- Submenu / Mega Menu: This is the dropdown menu when customer click on an item in the Main Menu. It will be considered a ‘Mega Menu’ when one of the columns (usually the first one on the left or right) contains a host of secondary submenus as seen in the pictures below.
- Mobile Menu: This kind of menu is optimized for mobile devices.

Each part is defined by a Menu items (orlink lists) . Menu items are links to products, collections, webpages, blog posts, policies, or other websites. You can add menu items to link to:
- webpages
- collections
- products
- blogs or blog posts
- store policies
- external websites
- email links
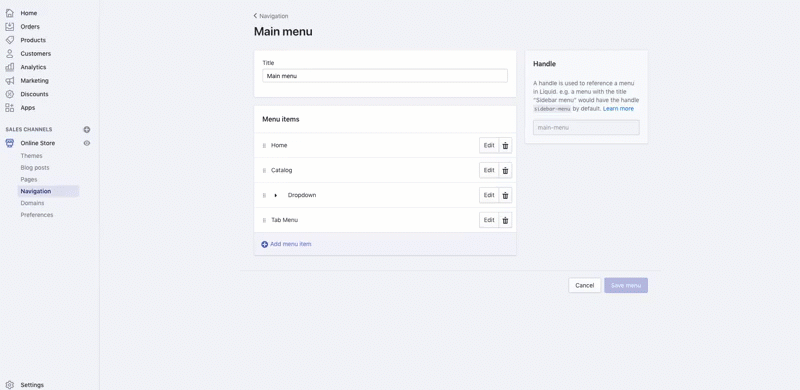
Step 1: Add & Assign Main Menu
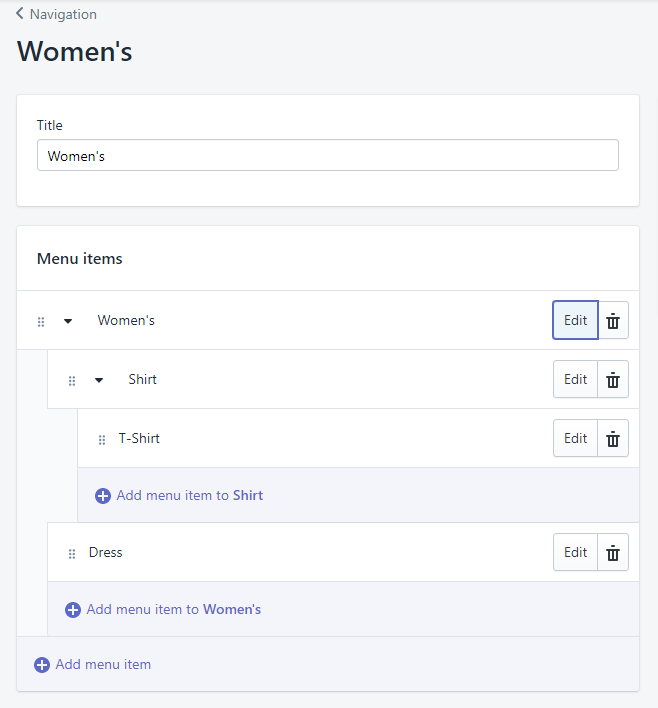
1. Create a Menu (Nesting Menu)
Shopify already have tutorials for 'Add, remove, or edit menu items. You can look at them again here
Below is the video tutorial for your reference.
Create a Nesting menu item

You can build drop-down menus by creating or moving menu items so that they are “nested” below a top-level item. The top-level item will appear in the main menu of your online store, and the nested menu items appear in its corresponding drop-down menu. The top-level item can only have up to two levels of nested drop-down menus
2. Assign the menu as Main Menu (need comparison between themes)
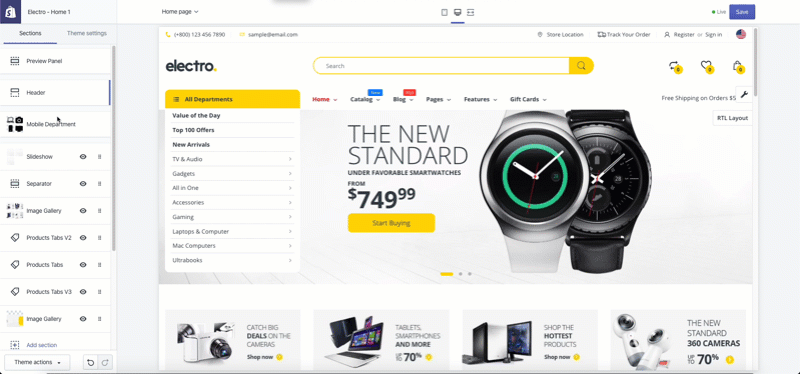
For Electro 5.0-6.0, and before:
- From your myShopify Admin Homepage, go to
Online Store>Themes. - Find the theme that you want to edit and click
Customize. - Select
Sections>Header. - Select a Menu item -
Link Listfor Main Menu. - Click
Save. You can see how this can be done in the picture below: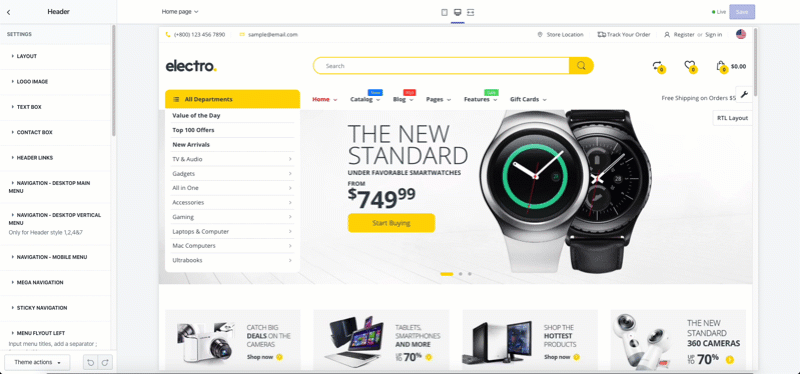
From Handy, XStore and after:
- From your myShopify Admin Homepage, go to
Online Store>Themes. - Find the theme that you want to edit and click
Customize. - Select
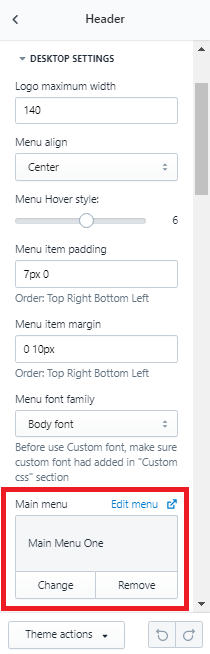
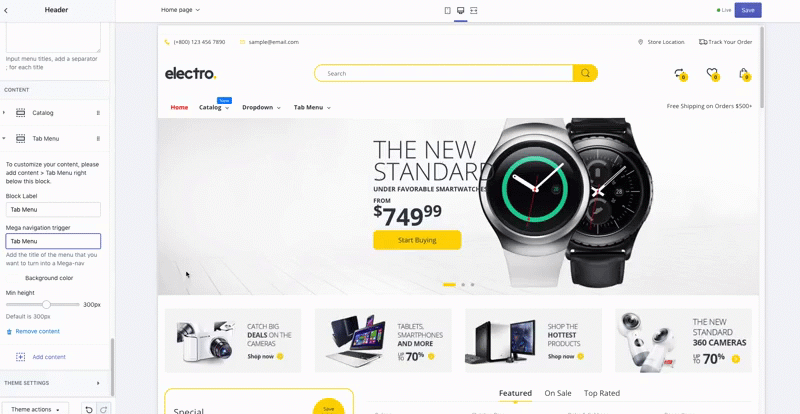
Sections>Header. - If you want to choose the Main Menu for desktop and tablet, click
DESKTOP SETTINGS. If you want to choose the Main Menu for mobile, clickMOBILE SETTINGS. - Scroll down for Main Menu box > click
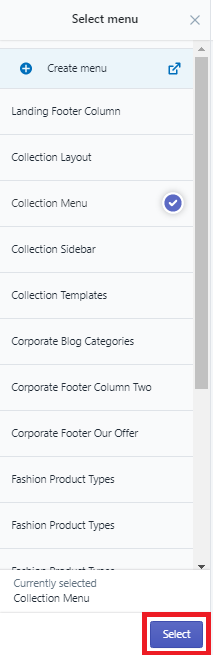
Change. - Choose the menu you want made into ‘Main Menu’, for this tutorial I chose the ‘Collection Menu’ as seen in the picture below.
- Click
Select.
You can see how this can be done in the picture below:
 |  |
Step 2: Create a Sub menu from the Main Menu
Go to Configuration Mega menu
- From your Shopify admin, go to
Online Store>Themes - Find the theme that you want to edit and click
Customize - Select
Sections>Header - Select a Menu item -
Link Listfor Main Menu - Select
Enable Mega Menu Option - Add
Content& Configure Mega Menu Detail - Add Content Tabs (only for Mega Menu with Tabs )
- Click
Save
Mega Menu usually build in 4 content layouts:

- Mega Navigation: Horizontal mega menu for the
Main menu - Mega Verticle Navigation: Horizontal mega menu layout for
Verticle main menu - Mega Navigation with Tabs: Horizontal mega menu with Tabs for the
Main menu - Tab Menu: Tab Content for
Mega Navigation with Tabs
1. Create Sub-Mega Navigation & Sub-Mega Verticle Navigation
Mega Menu Content Layouts
If you would like to build a defined layout, you’ll want to become familiar with The Grid.
The Grid is just a way of subdividing a container (generally the Sub menu - Mega menu -) into columns.
Arena Mega Menu has the ability to divide each mega menu from 1 to 12 columns - Bootstrap 4 Grid 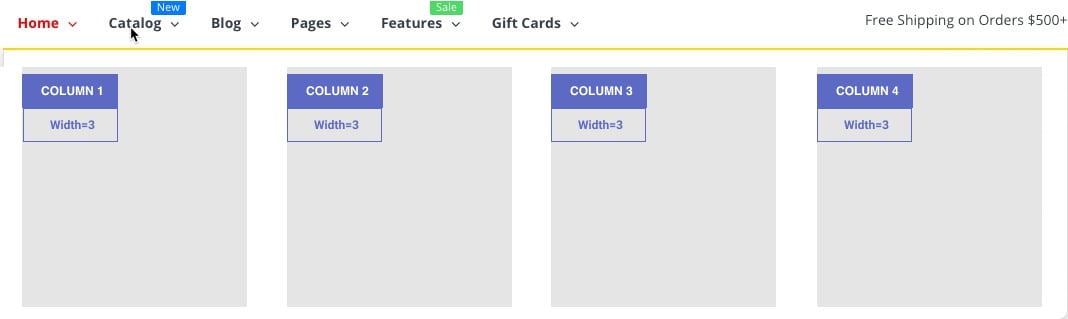 Depending on the theme, each Mega Menu should be 4 or 5 Sub-menu items (COLUMN 01 - 04/05)
- From
HeaderSection settings, ClickAdd Content - Click
Mega Navigation, the mega menu option forMain menushow up. - Configure Parameter
Parameter Description Block Label Block name for indentify Mega navigation trigger Add the title of the menu (in main menu) that you want to turn into a mega menu Submenu Position Position submenu appear relative to the main menu bar Width Sub menu width percentage relative to main menu width Background Settings Configure background images / color for the sub menu Min height Set minimum height for the sub menu COLUMN 01 - COLUMN 4 Configure content for each column in layouts - Add Column component contents
- Menu items: Normal menu items list
- Multiple menu items: Use Nestesd menu items to show multi menu item.
- Image: show an image.
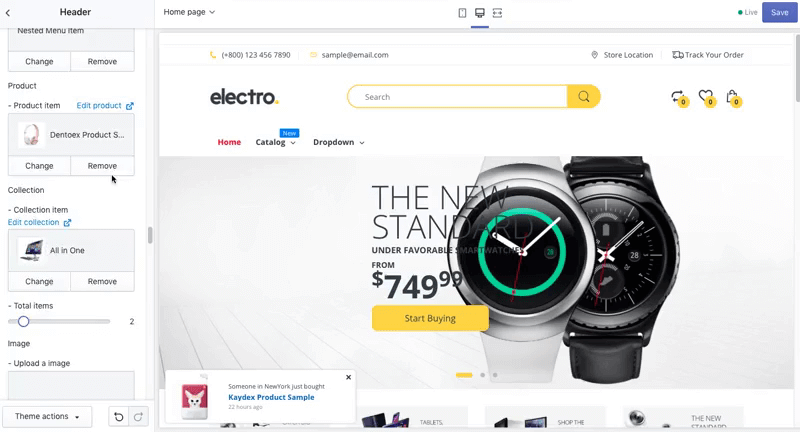
- Collection: collection products
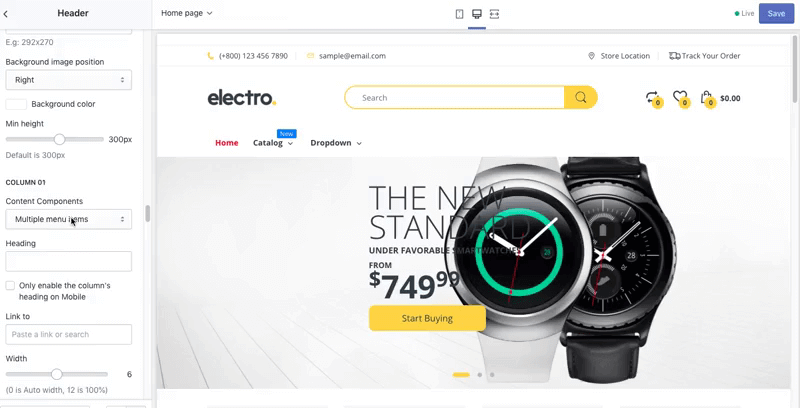
- Product: show one specific product.
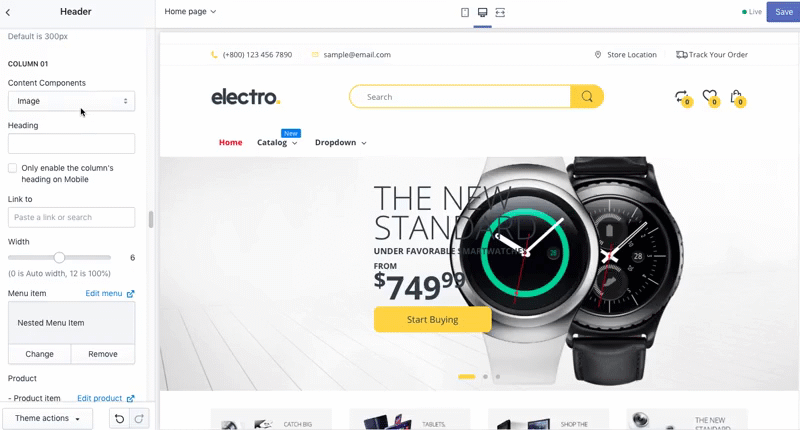
- Menu item & Product: menu item mix with product.
- None: disable column.
2. Create Sub-MegaNavigation with Tabs

In the case of tab submenu, you need to take 2 steps:
Ađd Mega Navigation with Tabs to define tab settings
Add Sub Tab menu content.
WARNING
Maybe it will limit the content block inside the tab menu in order to make it lighter
Click
Save
Add Navigation Label