Theme Installation
1. Install Theme & Import Demo Store Data with AClone Shopify App
Let’s get started with your online store! This method allows you to copy the entire demo store content, including design and settings, making your store look exactly like the demo.
For a complete visual tutorial, please view the video below:
Install the AClone App
- Visit AClone on Shopify App Store.
- Click Install and follow the setup instructions.
Activate Your Theme
- Open the AClone app in your Shopify admin.
- Find Activate Unique Code.
- Enter the Purchase Code from Envato or your theme supplier, then click Activate.
Your store will now connect to the demo store and let you import the demo content.
Don’t know where to find your Purchase Code?
- Visit Where Is My Purchase Code? for step-by-step instructions.
Import Demo Data After activation, go to the Import section in the Aclone app.
Select the data packages you want to import:
Content Data Package: Includes products, collections, files, metafields, etc.
Theme Data Package: Includes all theme settings, layout, and styles.
Important: Always start by importing the Content Data Package first to ensure the theme functions properly, as it relies on demo content.
Click Import and wait for the process to complete. This might take a few minutes depending on the size of the demo data.
You can import other demo theme packages directly from the Aclone without re-importing the content data.
If you encounter any issues during the import, check the Aclone App logs or contact support for assistance. By following these steps, your Shopify store will look exactly like the demo store, and you’ll be ready to start customizing and selling in no time!
2. Manually
2.1 Theme Package Upload
- Download
theme packagefrom ThemeForest Download. - Unzip/extracted the file on your computer.
If you don’t know how to unzip, read more How to Unzip Package
You'll see 4 folders inside: . ├─ arenafont --> contains icon font arenafont and detail ├─ theme-package (aka upload) --> contains the theme's package zip files │ └─ package-theme.zip ---> Upload theme package to Shopify └─ pre-setting --> contains the sample data file `settings-data.json` as our demo. ├─ documentation --> User Guide folder └─ readme.txt - From your Shopify admin, go to
Online Store>Themes - In the
More themesarea, clickUpload theme. - From the
Upload theme,Choose Fileto select the.zipfile that you want to upload. - Click
Upload. The theme will be added to the Themes page of your admin.
It is installed, but not published. When you’re ready to unveil your new look to the world, click Publish theme.
2.2 Change Demo Preset Setting
The settings_data.json file stores the theme settings data saved from the theme editor. It can include “theme styles”, also known as Presets.
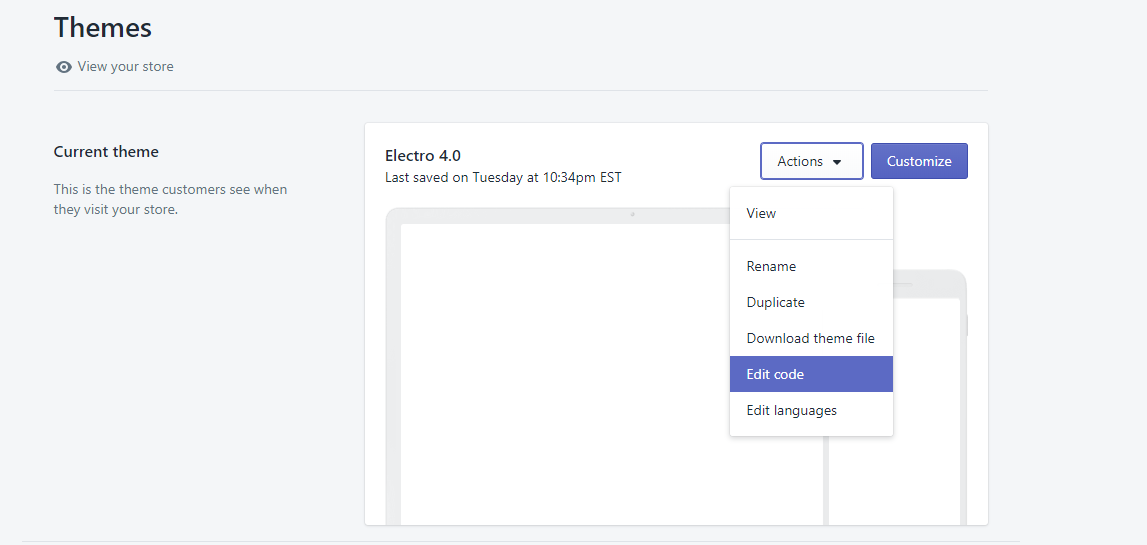
- From your Shopify admin, go to
Online Store>Themes. - Find the theme you want to edit, and then click
Actions>Edit code
- Locate and click on the
Config>settings_data.json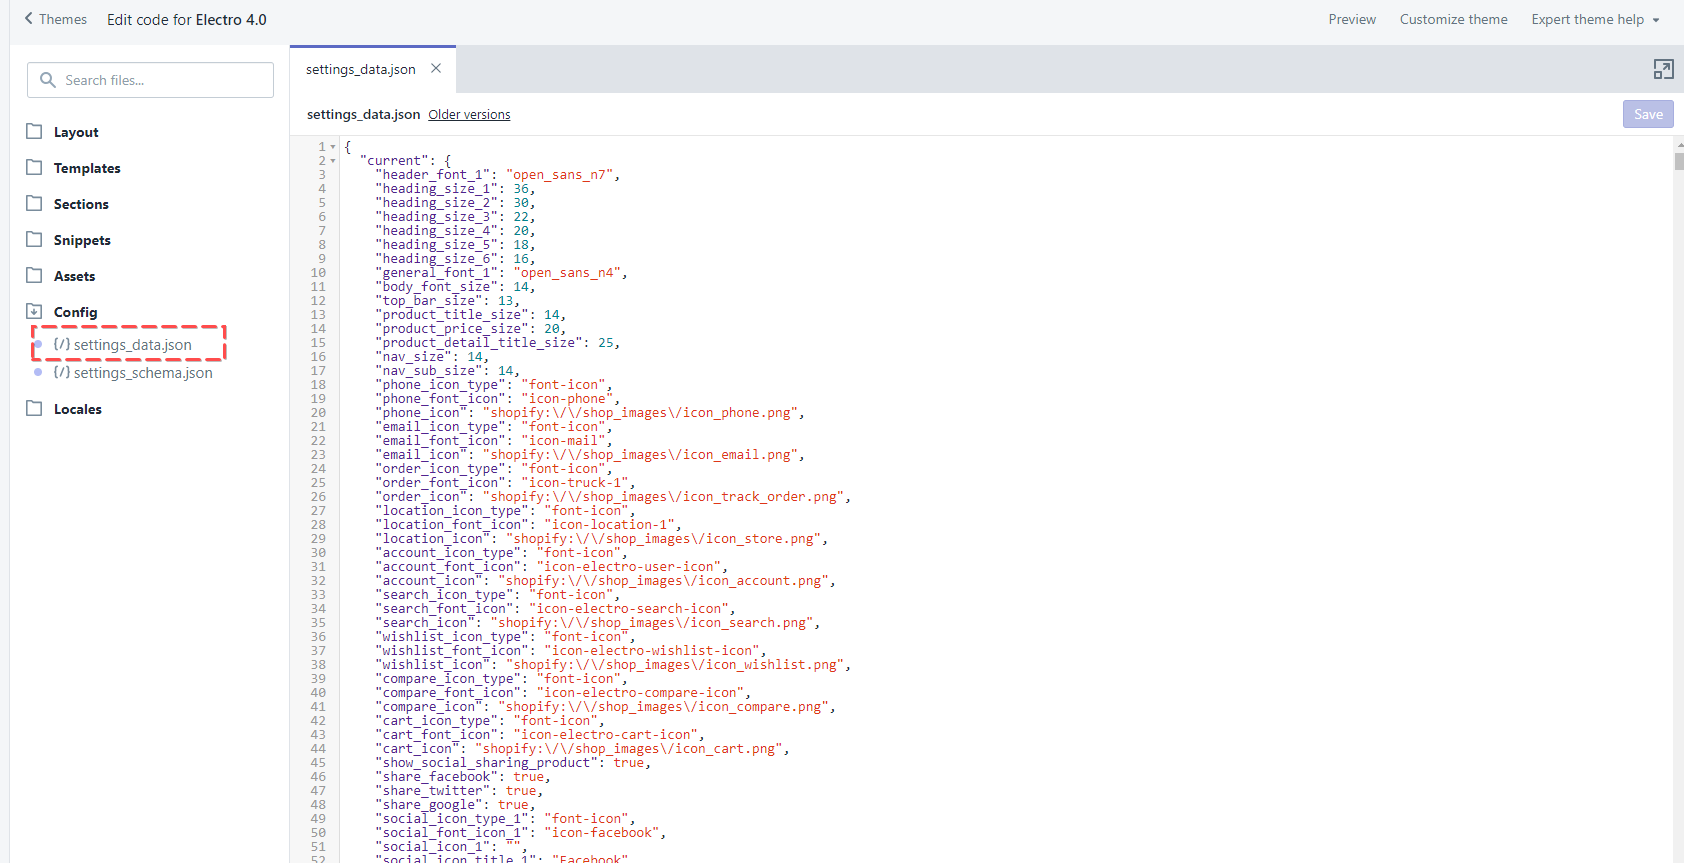
- Replace current
settings\_data.jsonby the new one atpre-settingfolder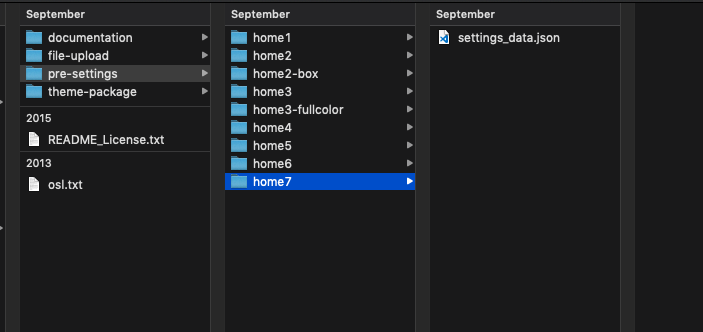
- Open
setting_data.jsoninpre-settingsfolder. Click to Open. - Copy & Paste content to settings_data.json in Web Browser.
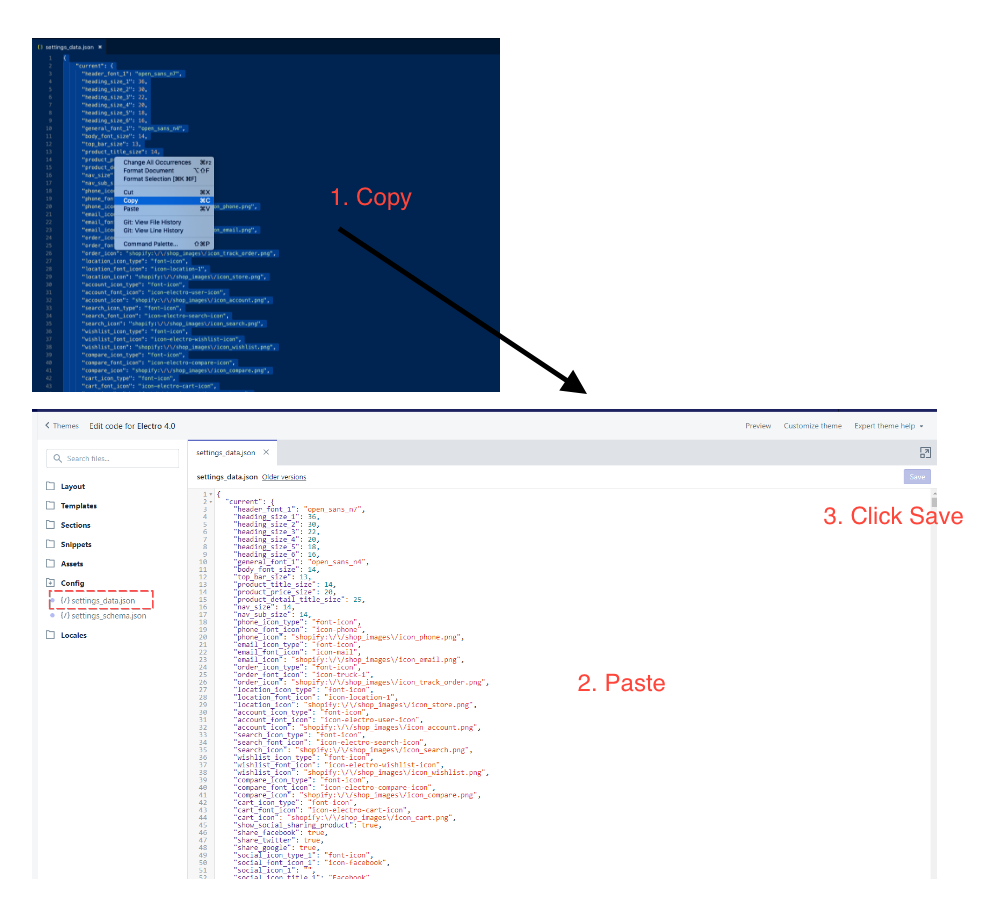
- Click
Save
- Open