Create and Customize Page
How to Create a Shopify Page
- From your
myShopify Admin Homepage, go toOnline Store>Pages. - Click
Add page. You will be taken to a new webpage editor. - In the webpage editor, enter a
TitleandContentin the text boxes provided.Be descriptive and clear when choosing your webpage title. The webpage title is displayed in the tab or title bar of browsers. It is also used as the title in search engine results. Learn more about website SEO.
- In the
Visibilityfield, you can select whether you want your webpage to be published or not. By default, your new webpage will be visible when you clickSave. Select theHiddenoption if you want your new webpage to be hidden from your online store, or clickSet a specific publish dateto control when your webpage is published. - In the
Templatefield, you can select page template (page type) that you would like to apply.
There could be more than 1 template
Depending on the theme, don’t forget to Publish theme before creating any page.
Read more: Official Shopify Guide
- Click
Save.
Customize a Shopify Page with Section
Before diving into customizing, we will get you familiar with out page system. There are 22 pages all our themes have. They are:
| - Home page. - Product page. - Collection page. - Collection list. - Blogs page. - Blog post page. - Cart page. - Checkout page. - Error 404 page. - ‘About Us’/ Testimonials Page. - FAQ page. | - Wishlist page. - Compare page. - Contact page. - Gallery page. - Information/ Terms and Conditions page. - ‘Our team’/ Team member page. - Shipping Policies page. - Search Results page. - Shipping & Return page. - Size chart page. - Order Tracking page. |
All of them are comprised of the same elements and a few unique elements that help them execute their functions.
To start customizing, go to your myShopify Admin Homepage:
- In the
Online Storetab, click onTheme. - Find the theme that you want to edit and click
Customize. - From the top bar drop-down menu, select the page that you want to configure.
- Start configuring from the tab
Section. - Add Page Content (if it available with pre-define pages template the theme support).
- Click
Save.
There are some customizations that can be done for the whole theme including every page in it. These customization options can be found in the Theme settings tab instead, including:
- General settings: Layout, Background/ Background Body Page.
- Typography.
- Fomo popups.
For the customization of each section that all our page templates share, please see below.
Announcement Bar
Header
Text Slider
Footer Widgets
Footer
Mobile Bar
Newsletter Popup
Custom CSS
For customizing the unique elements of each page type, please check the Pages section in each theme’s User Guide to learn specific tweaks and modification of individual page type belongs to that theme.
How to Create a Store Locator Page
- Repeat step 1 to 4 of the ‘How to Create a Shopify Page’ above.
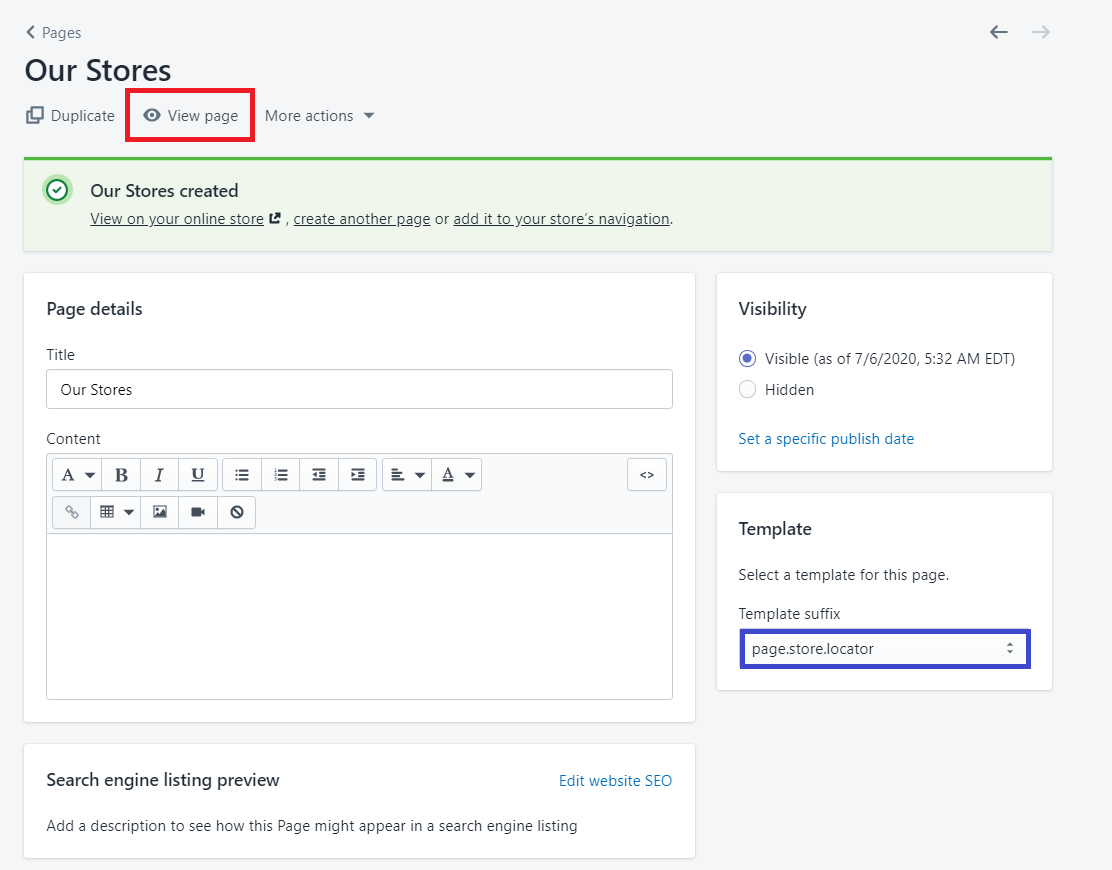
- In the
Templatefield, select ’page.store.locator’ template. Here I named the page ‘Our Stores’ for easy recognition. - Click
Save. - Click
View page.
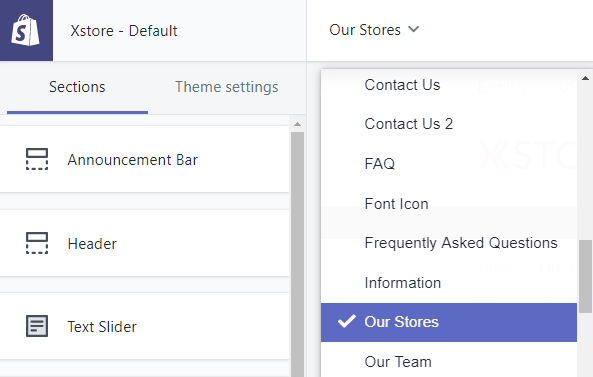
- Go to Theme Editor, choose ‘Our Stores’ from the page dropdown menu.
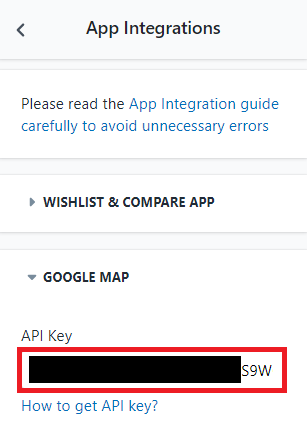
- Go to
Theme settings>App Integrations>GOOGLE MAPand enter your API key. To find out, click How to Create a Google Map API Key. ClickSave.
- Go back to
Section, click onStore Locator Pagetab > clickMAP CONFIG.
- Geolocation service: Select this to use Google location service to help customers find the stores near by.
- When you disable ‘Geolocation services’. Type by Latitude and Longitude in the format:
Latitude, Longtitude.
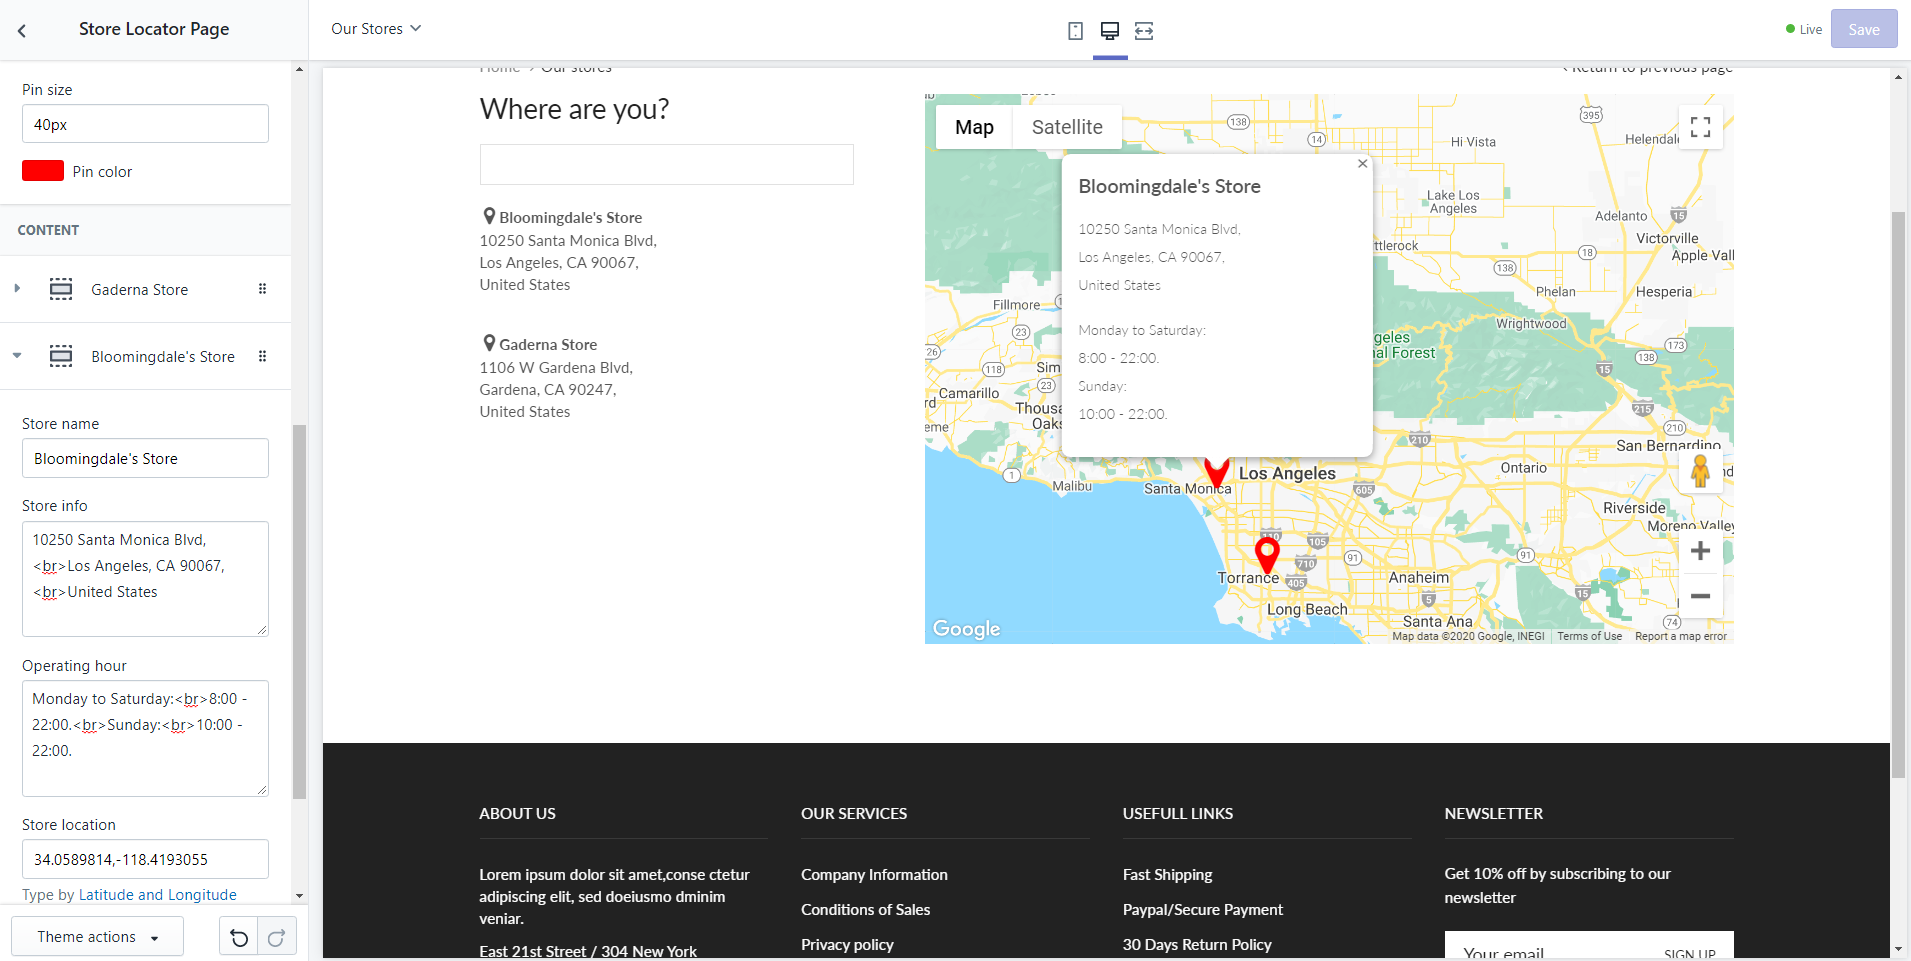
Add Store Location
- Click
Add storesat the bottom - Fill in ‘Store name’.
- In the ‘Store info’ section, type in your store location address.
- Fill in ‘Operating hours’, instead of clicking Enter on your keyboard to move down a row, type in
with no space between it and the letters instead. - Fill in ‘Store location’ in the format:
Latitude, Longtitude. - To add more locations, simply click
Add storesat the bottom and repeat. - To change map style, choose the style here, click ‘Expand code’, then copy all the codes and copy into ‘Map style’ text box.

- You can also set the Location Pin’s color and size below the ‘Map style’ text box.
- Click
Save.
The final page would look like this: