Using Custom Fields in Your Shopify Theme
You can use metafields to add custom fields to objects such as products, customers, and orders. Metafields are useful for storing specialized information, such as part numbers, customer titles, or blog post summaries. They can be used by apps and channels to track data for internal use.
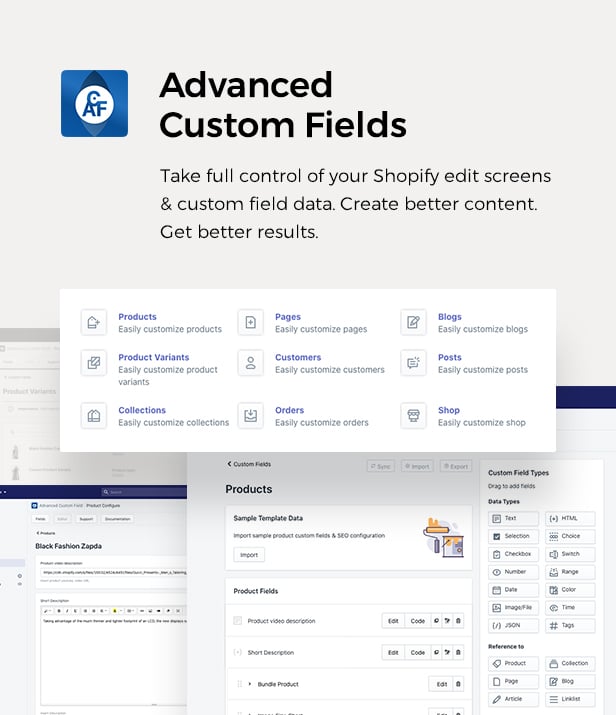
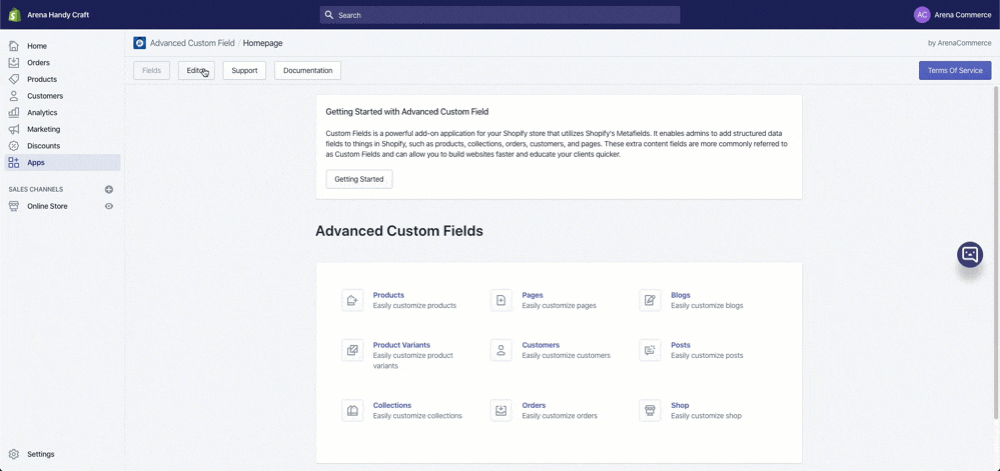
Advanced Custom Field (ACF) a powerful application for your Shopify store that utilizes Shopify’s Metafields. It enables admins to add structured metafield fields (custom fields) to things in Shopify (objects), such as products, collections, orders, customers, and pages. These extra content fields are more commonly referred to as Custom Fields and can allow you to build websites faster and educate your clients quicker.
More detail https://help.shopify.com/en/manual/products/metafields
1. Installing Advanced Custom Field (ACF)
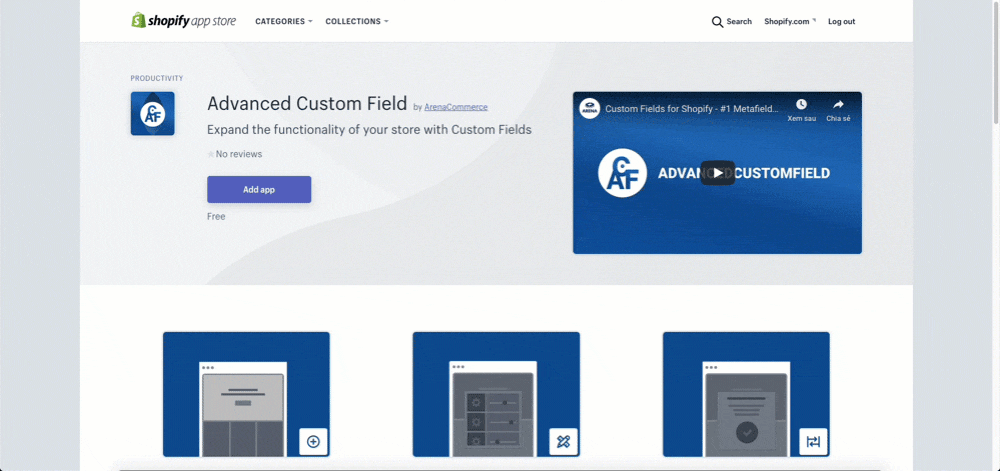
- Step 1: Go to Advanced Custom Field in the Shopify App Store after you logged in to your myShopify account.
- Step 2: Click the
Add Appbutton. - Step 3: Log into the App Store.
- Step 4: Confirm App installation by click
Install App. - Step 5: Use the app! Your newly installed app will live in the App section of your Shopify Admin.
2. Using ACF to extend Your Store Content
Quick Start
ACF supports import the default metafields that we use in most themes.
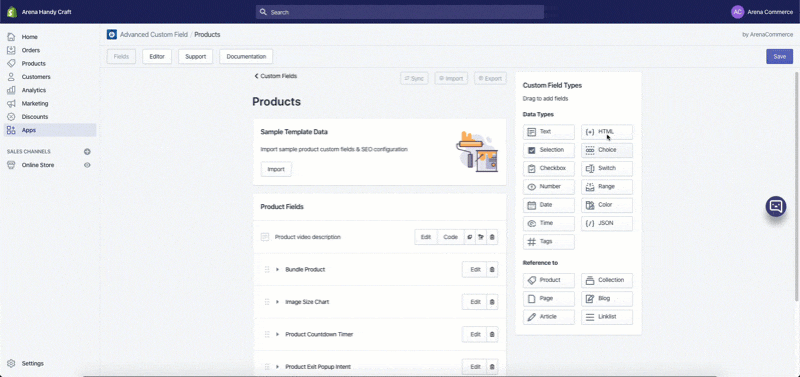
- Step 1: Go to Apps > Advanced Custom Field > Fields > Products
- Step 2: Click Import Button
- Step 3: Click Save Button
Now you can go to Editor tab to edit your product custom fields content.

Note
- All of the following metafields are for resource Products.
- To know which metafields in the list below can be used in your ArenaCommerce theme(s), please refer to corresponding theme’s documentation or contact us.
You may also following instruction below to add custom field manually
Product Short Description / Exception Description
- Step 1: At Field tab, create a HTML Field Product Description.
How to add new field.
- Step 2: Click Save button to save your changes; then go to Editor tab’s resource “Products” and pick a product to start with.
Use search bar to quickly find specific products.
- namespace: c_f - key: description_excerpt - label: Short Description
- Step 3: Click Save button to save your changes; then go to Editor tab’s resource “Products” and pick a product to start with.
- Step 4: On next page, pick a product item for each field editor via resource picker. Add your product short description.

- Step 5: Click Save button to save your changes.
Use left - right arrow buttons to navigate to previous - next items.
Countdount Timer
Step 1: At Field tab, create a date field
- namespace: c_f - key: countdown_timer - label: Date format is mm/dd/yyyy
It is required to set date format as mm/dd/yyyy in order for countdown to work.
- Step 2: Click Save button to save your changes; then go to Editor tab’s resource “Products” and pick a product to start with.
- Step 3: On next page, pick a date
- Step 4: Click Save button to save your changes.
Countdount Timer is all set up.
Bundle Product
Step 1: At Field tab, create a group called Bundle Product.
Step 2: Create 2 product reference fields in that group
namespace: c_f - key: bundle_1 - label: Add your product handle #1!
namespace: c_f - key: bundle_2 - label: Add your product handle #2!
Step 3: Click Save button to save your changes; then go to Editor tab’s resource “Products” and pick a product to start with.
Step 4: On next page, pick a product item for each field editor via resource picker.
Use left - right arrow buttons to navigate to previous - next items.
- Step 5: Click Save button to save your changes.
And… That’s it! Bundle Product is all set up. You can refer to our example work at https://electro.arenacommerce.com/products/gold-diamond-chain
Exit Intent Popup Product
Step 1: At Field tab, create a group called Exit Intent Popup Product.
Step 2: Create 2 text fields in that group
namespace: c_f - key: discount_code - label: Add your Coupon code for the product
namespace: c_f - key: discount_percent - label: Display percent of discount
Step 3: Click Save button to save your changes; then go to Editor tab’s resource “Products” and pick a product to start with.
Step 4: On next page, add your coupon code and display percent of discount
Step 5: Click Save button to save your changes.
Exit Intent Popup Product is all set up. You can refer to our example work at https://electro.arenacommerce.com/products/black-fashion-zapda-shoes
Bulk editing product metafield
As we’ve seen, metafields have three components: a namespace, a key, and a value. Once you know the namespace and key for your metafield, you can display it in the bulk editor by making small changes to the URL of the bulk editing page in the Shopify Admin.
Eg. Collection page: https://shopify.com/admin/bulk?resource_name=Collection&edit=metafields.c_f.subcategory:string
In this URL, c\_f is the metafield’s namespace and subcategory is its key. You can replace these with values to match your use case. The string part of the URL tells Shopify about the type of data that we want to store in the metafield. The bulk editor is able to display five types of metafields – string, money, boolean, select and number