XStore Theme Installation
Let’s begin the first step of building your dream online store!
This step-by-step guide will show you completely how to install and verify your purchased theme.
Google Chrome Browser is a requirement for installing and operating the theme and all its features.
For a complete visual tutorial, please view the video below:
Step 1: Installing Required App and Extension
In order to install the XStore theme or the other themes in our store, you will need to install 3 essential app and extensions. They also play a pivotal role in helping you navigate and customize our theme swiftly and effectively. They are:
- Arena Shopify Admin Extension
- Arena Dashboard App
- Arena Dashboard Importer Extension
To install them, please follow the step-by-step instruction below.
Installing Arena Shopify Admin Chrome Extension
- Arena Admin Chrome Extension support to import our Demo Store Menu (Navigation) to your store. To enable it:
Installing Arena Dashboard Shopify App
- Go to .
- Click Install Button.
- Input
Your Shopify Store URL, clickLogin.
Shopify Store URL form are usually:[examplestore].myshopify.com.
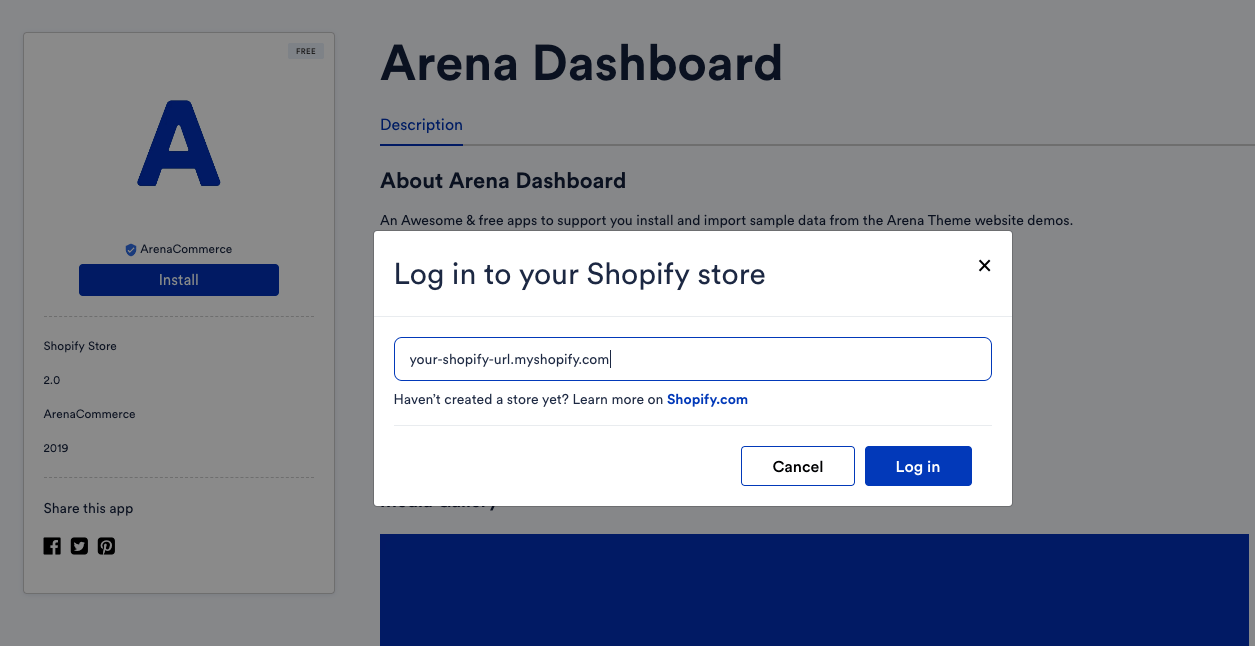
Sign into your Shopify account.- Click
Install unlisted app. - Use the app in the following step.
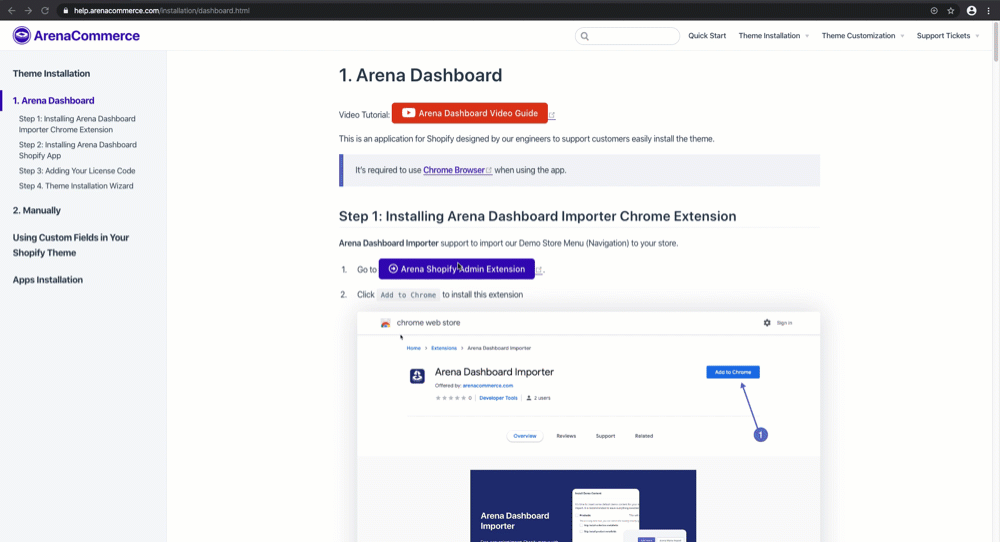
Installing Arena Dashboard Importer Chrome Extension
Arena Dashboard Importer helps in installing our theme to your Shopify store. To enable it:
- Go to
- Click
Add to Chrometo install this extension. - Click
Add extension. - Arena Dashboard Importer is now ready to install your theme.
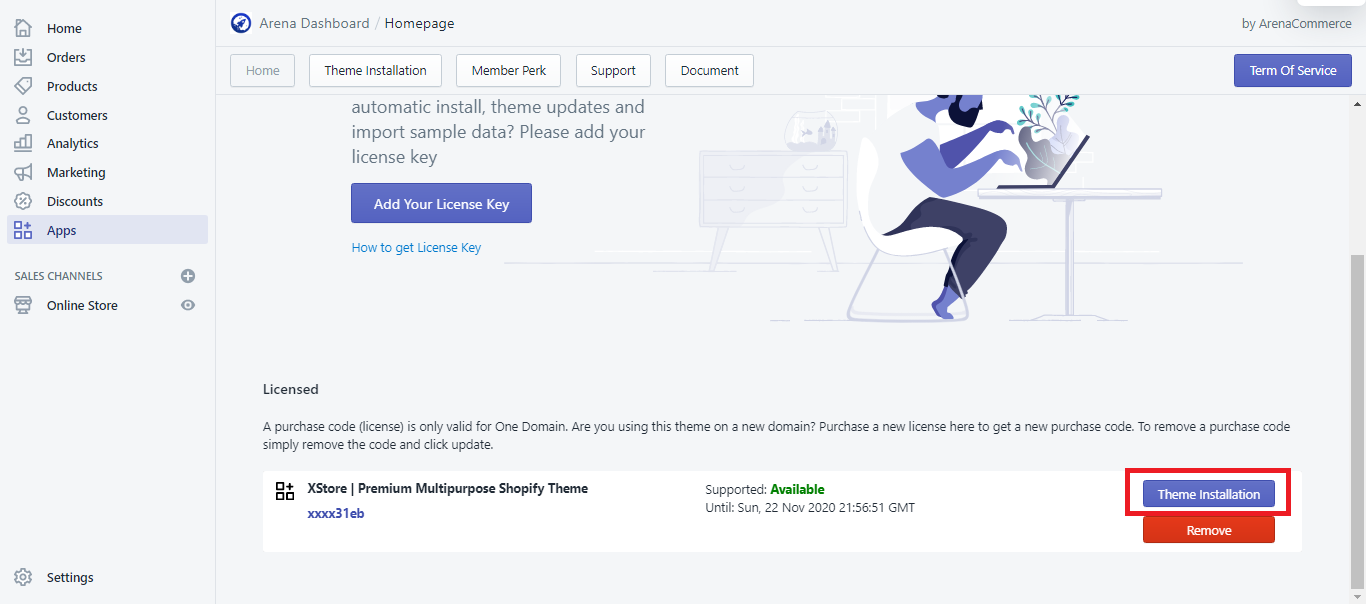
Step 2: Adding Your License Code
1. From your myShopify Admin Homepage, go to Apps, click Arena Dashboard. 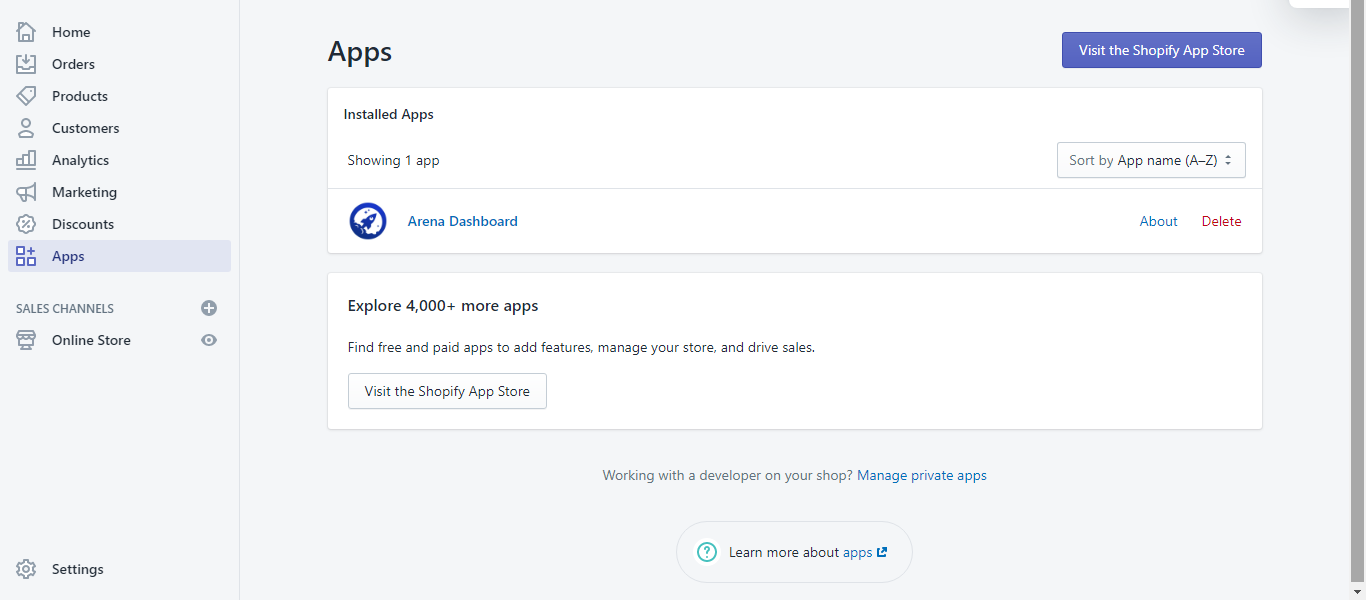 2. Click
 Add Your License Key. 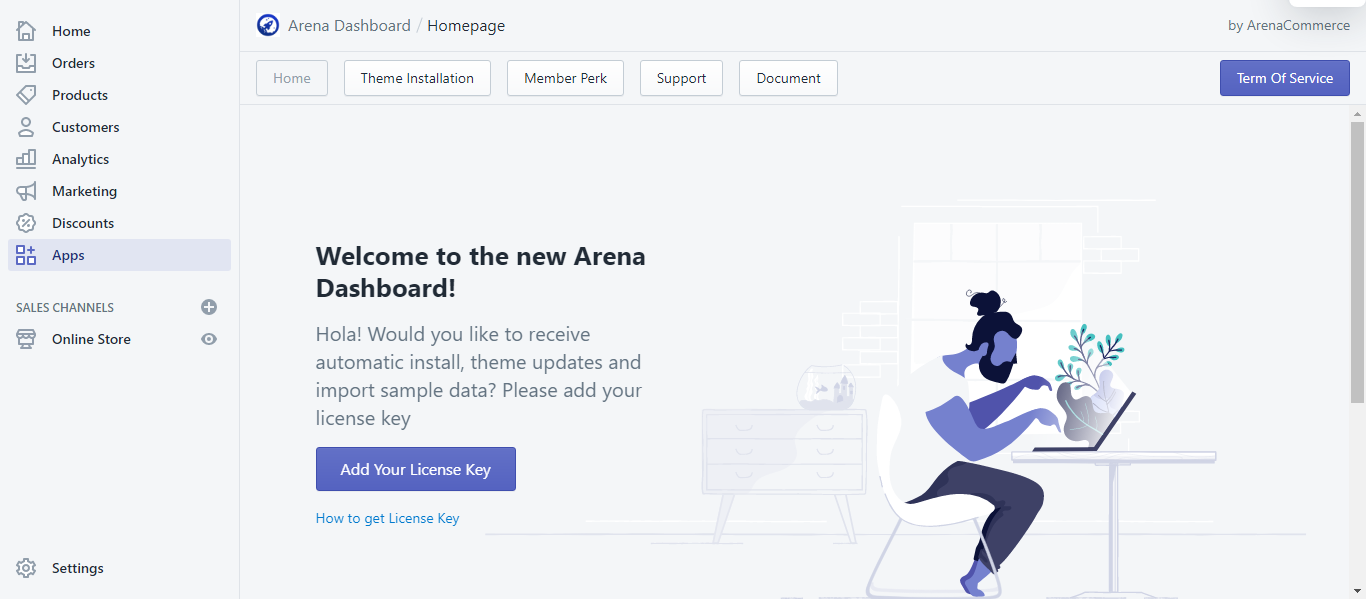 3. Insert the purchase code and click
 Active License Key. You can copy and paste the code from the License certificate & purchase code you downloaded through ThemeForest (Envato).
To find your purchase code, please expand this line and do as follows:
- Log into your ThemeForest (Envato) account and hover above your username in the top right corner to access the dropdown list. Select
Downloads. - Find the XStore theme in the list of item(s) you have bought.
You can also find the link to the XStore theme here. - Click the
Downloadbutton next to the theme.
From the drop down menu, click ‘License certificate & purchase code’ (available as PDF or text file). It is better to download the text file so you can copy and paste the purchase code when adding the license key to Shopify. Open the file and you will find the purchase code.
Here is an example of a PDF License certificate and purchase code: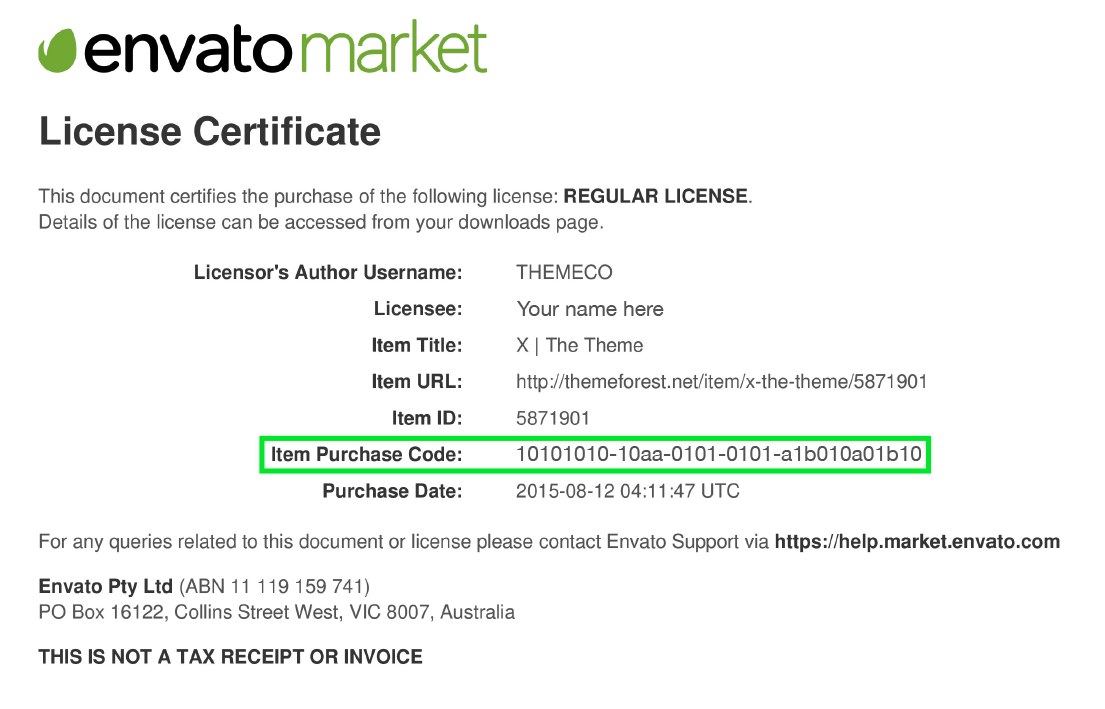 Source
Or click here to view in another window.
After your license code was added, a confirmation banner will appear:
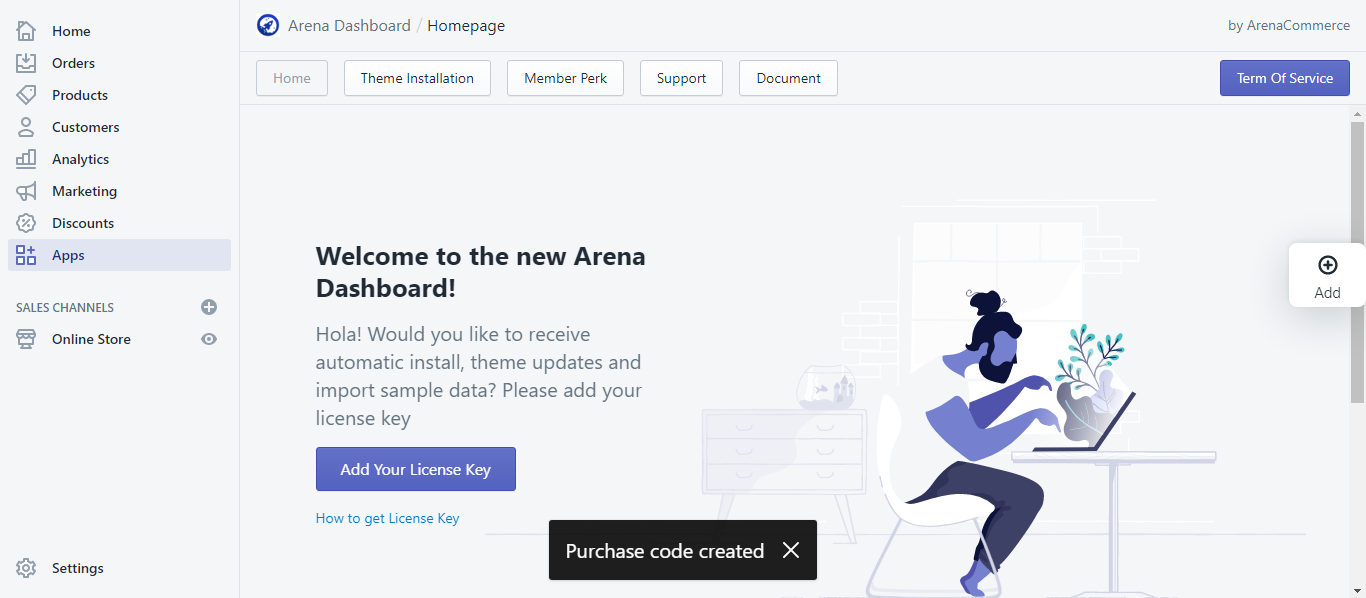
4. Your purchased theme will now show in the ‘Licensed’ board. 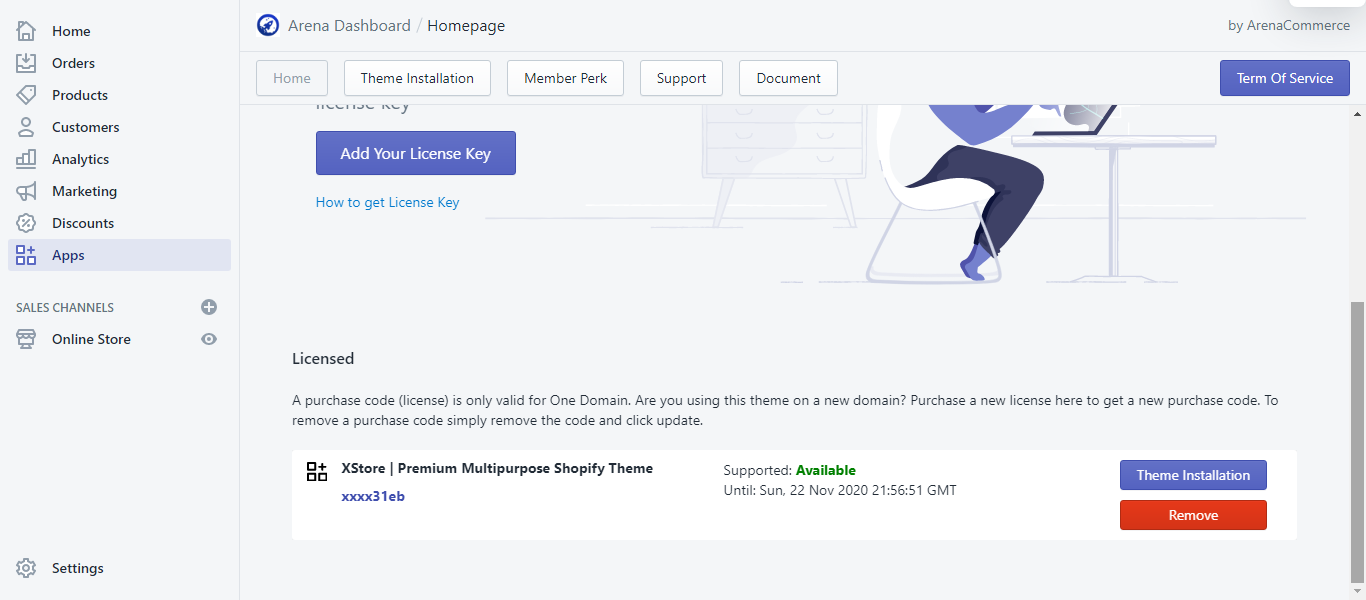
Step 3: In order to add more theme License Keys, repeat Step 2.
Step 4: Install the theme
To begin working on your store, you will need to unapck and upload the theme pack.
To do that, you can install the theme via the Theme Installation Wizard by doing the following:
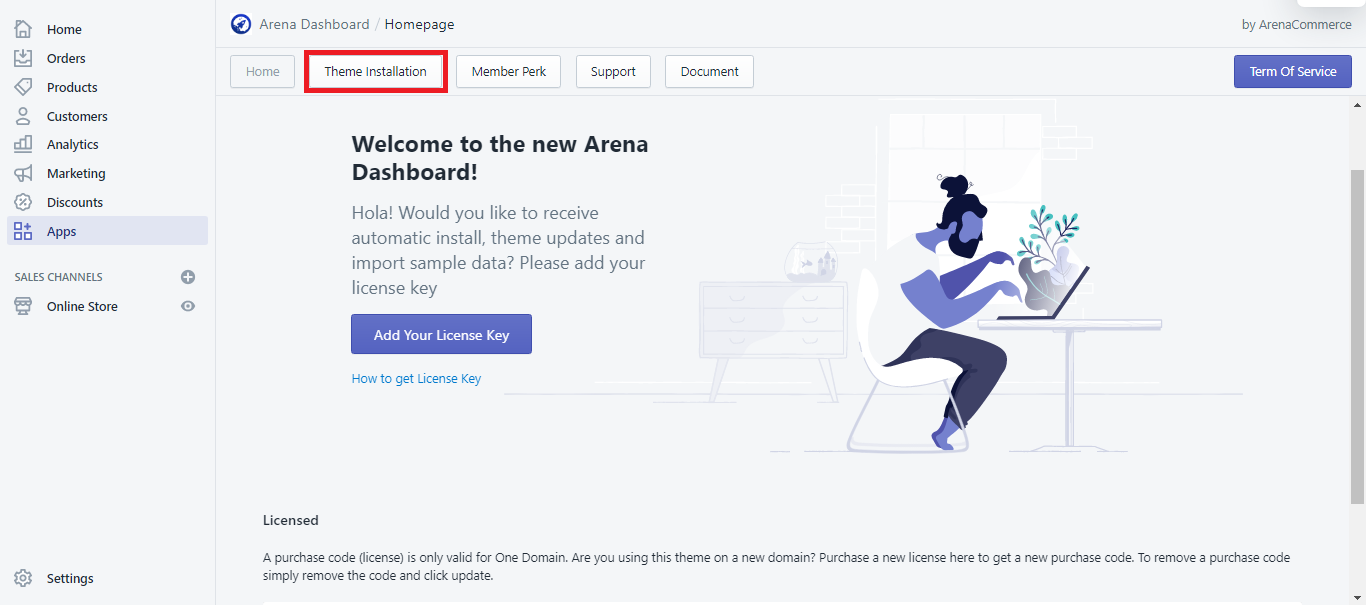
1. From the Arena Dashboard app admin, click the second tab Theme Installation.
You can also click on the Theme Installation button on the XStore theme tab in the License board.
2. Then when the ‘Installing New Theme’ screen appear, click Setup Wizard. 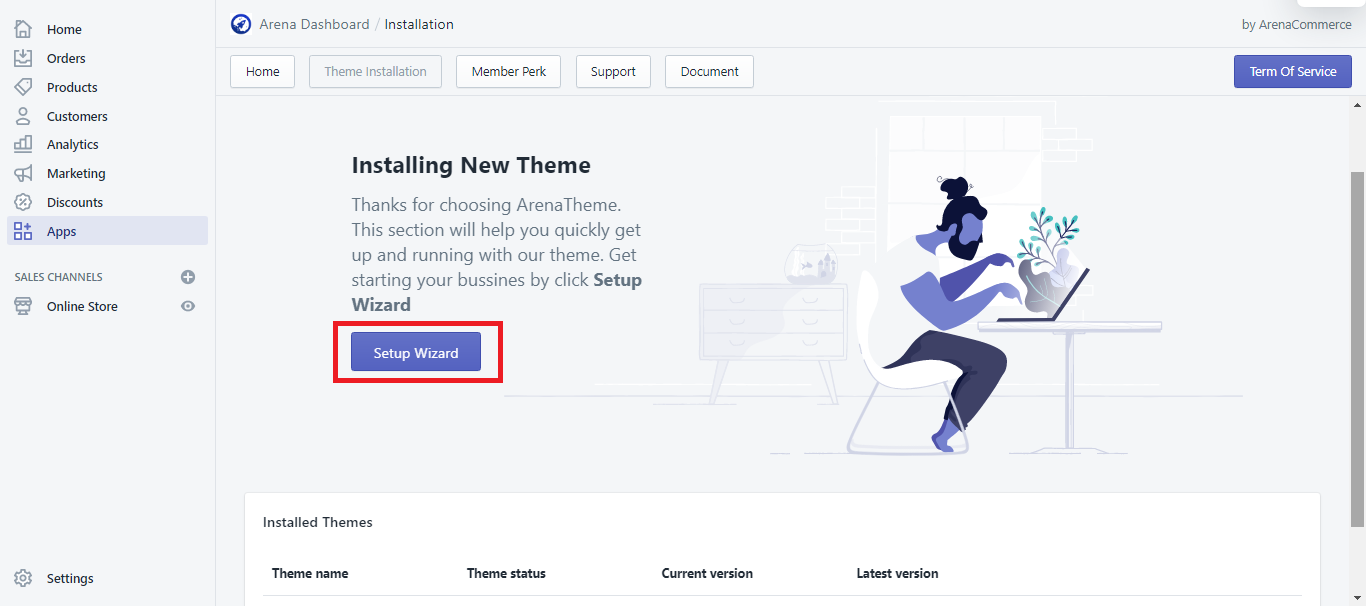
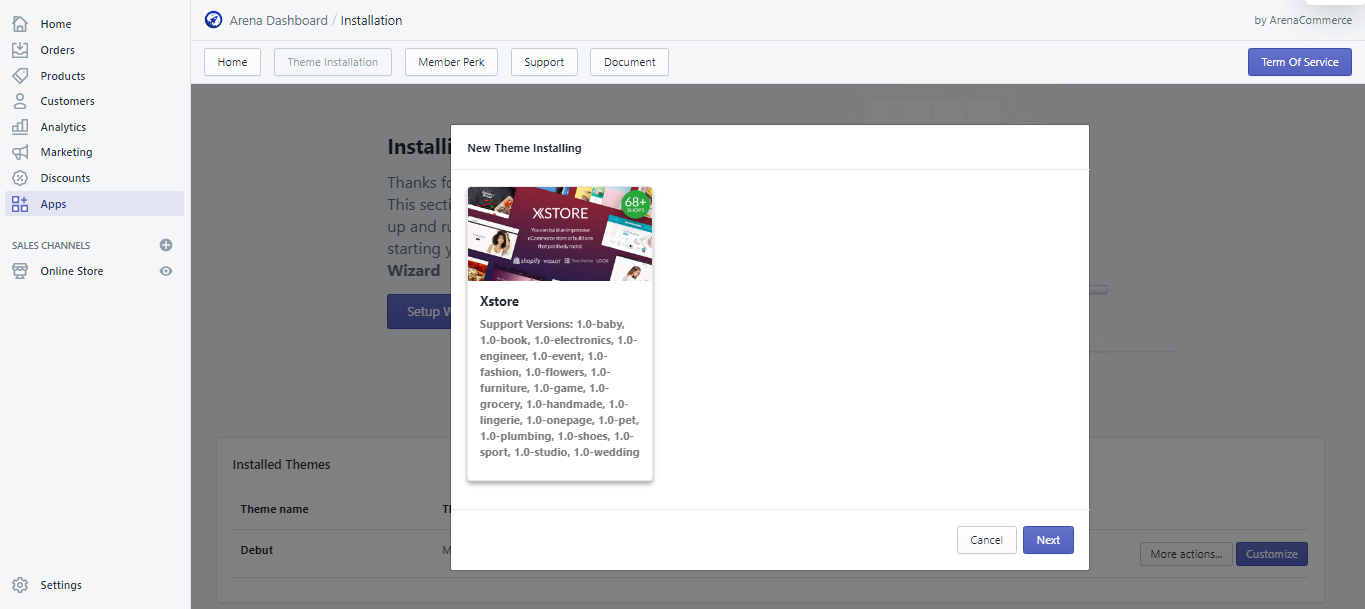
3. Select Theme package & click Next.
4. When the ‘Select Preset Demo Style’ box appear, select Version and Preset.
You can choose from XStore’s 68 presets ranging from Fashion, Sport and Beauty to Medical, Law and Corporation, the posibilities are endless!
Please take a look at our list of presets, or Demos here. Preview of each preset will also appear on the left of the box with each preset you click on to help you better grasp what each Demo offers.
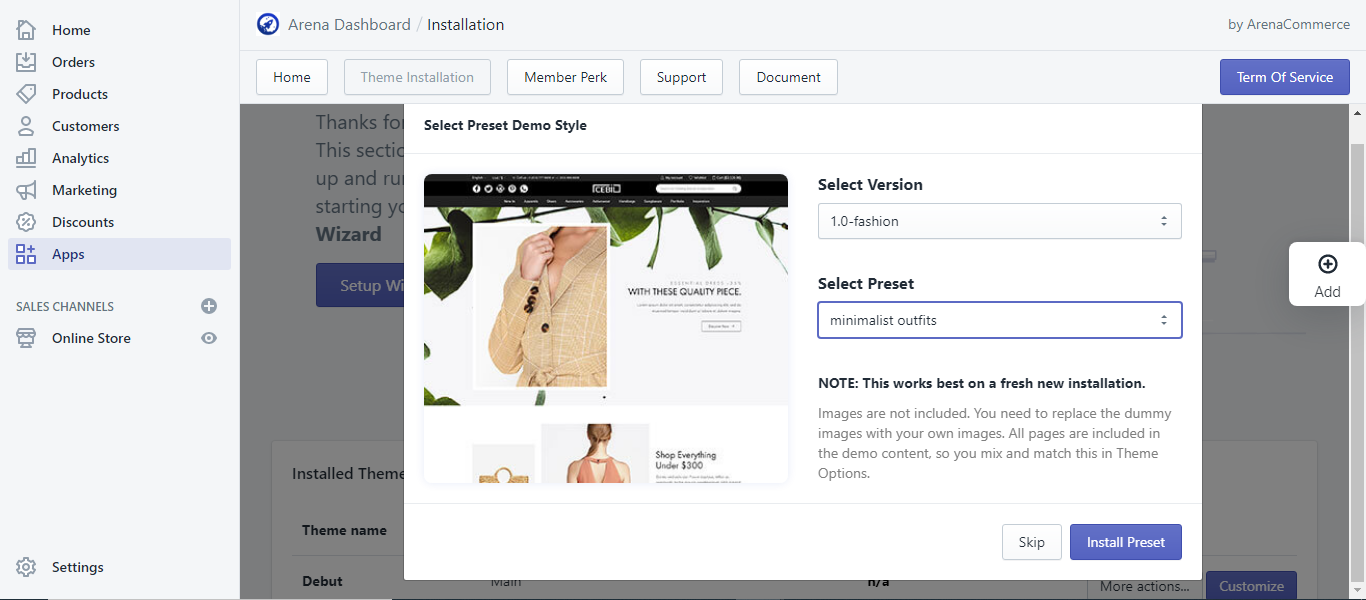
- Click
Install Preset. The app will install this theme package to your store right away!
For this tutorial I will install the preset ‘default’ of the version ‘1.0-fashion’ as seen below.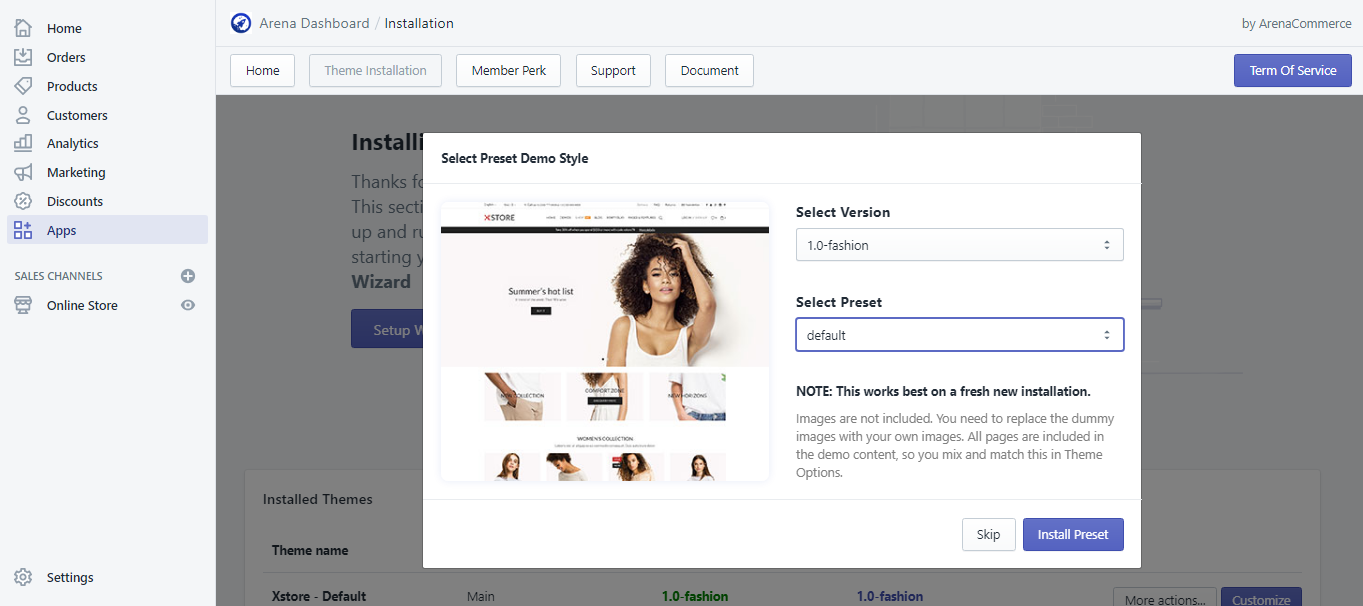
TIP
While there are options to skip installing the Collection and Product metafields, this will also prevent you to experience what the full extent our product can offer. However, if you are familiar with us and our product, you can choose these options to drive the installation process faster.
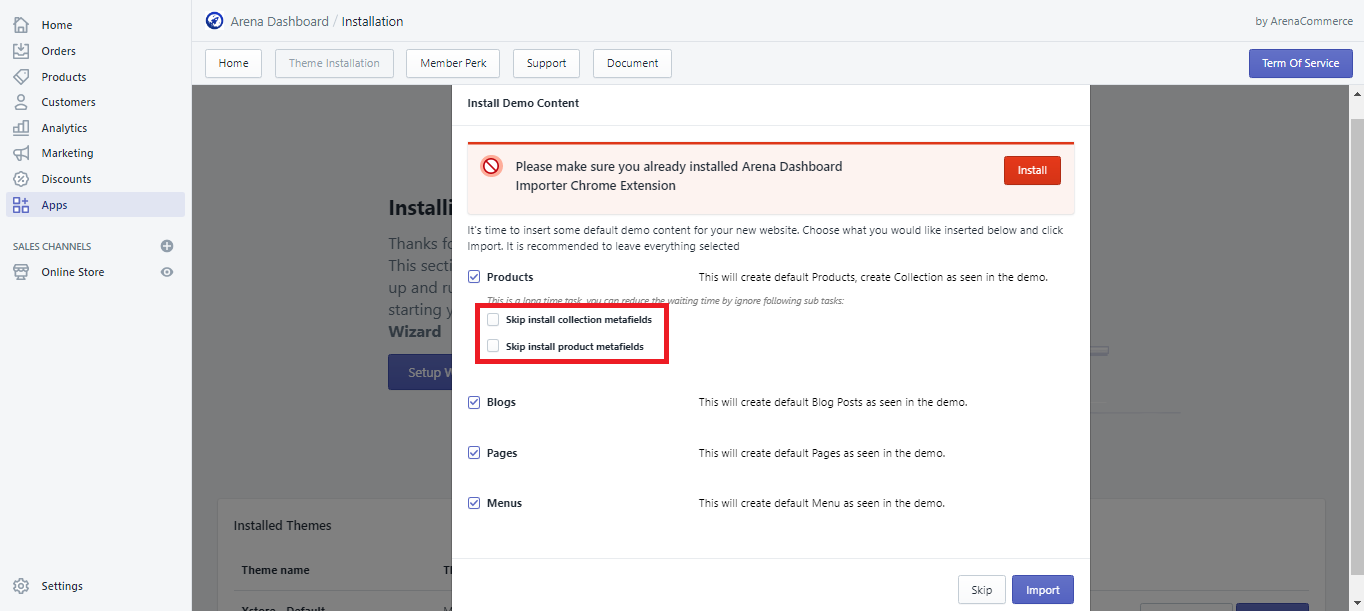 Please be advise: once the installation process is done, if you clicked these two
 Skip options, you can never experience them in the Demo. The only way to get them is to reinstall the theme.
If you have already has your own materials, click Skip to pass the import Theme Package step. This will stop import new theme package process to your store.
5. Check the Content Component you would like to import & click Import.
Installation and activation of the Arena Dashboard Importer Extension is essential to import the Demo theme. If you had not install and activate the extension, you can click on the
Installbutton to add the extension to your browser.
Please be aware that this is a Chrome-only extension and it is advisable that you install the theme and import the Demo on Google Chrome.
- Wait for tasks to finish.
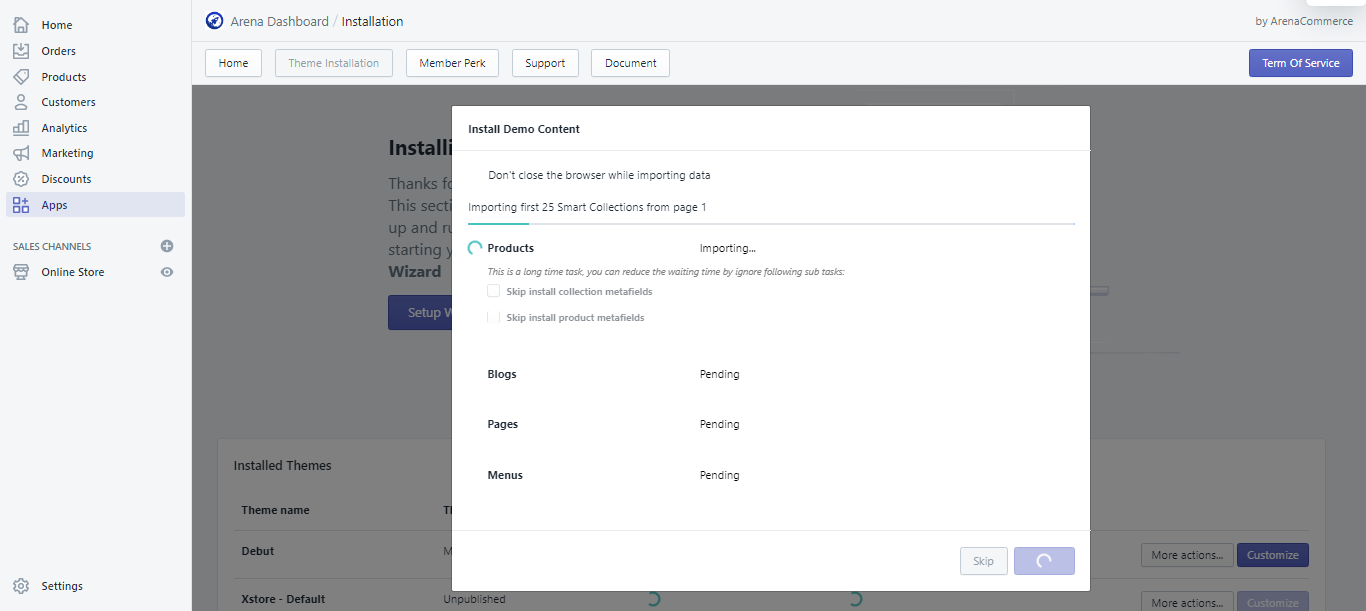
- While importing, a dialogue box will appear and request to open Navigation. Click
OK.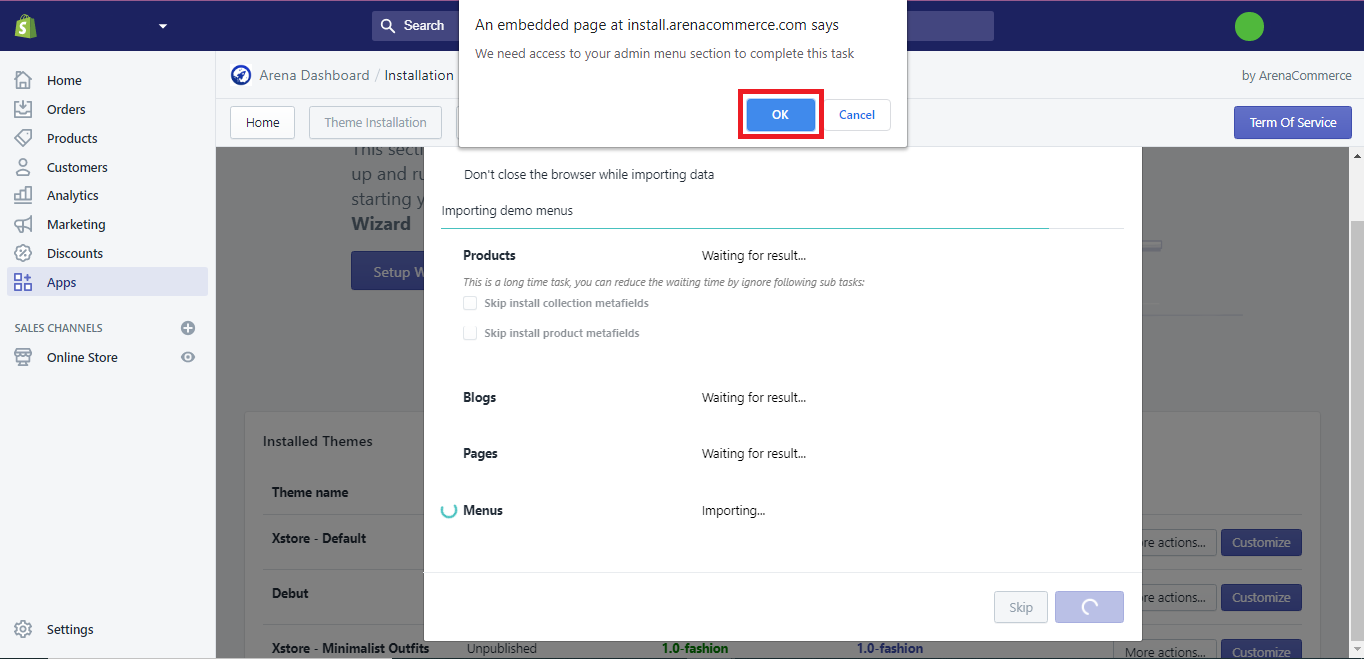
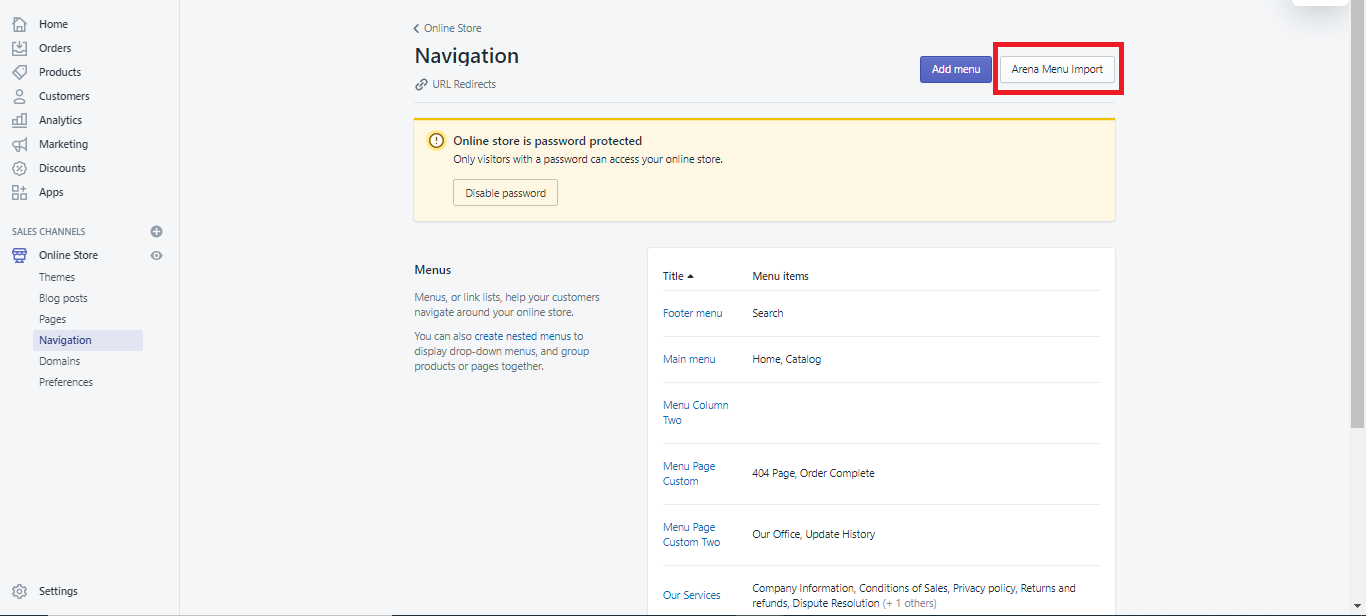
- A new window displaying Navigation section will appear. Click
Arena Menu Import.
- Wait for the task to finish and close the window.
***If error were to occur during import process, there are 2 possibilities:***
- You may not have installed and activated Arena Dashboard Importer Extension on Chrome.
- This is a result of a duplication in materials due to a previous unsuccessful theme install attempt or simply duplicate materials between installations.
- Wait for tasks to finish.
For the first posibility, the error screen will be as followed: 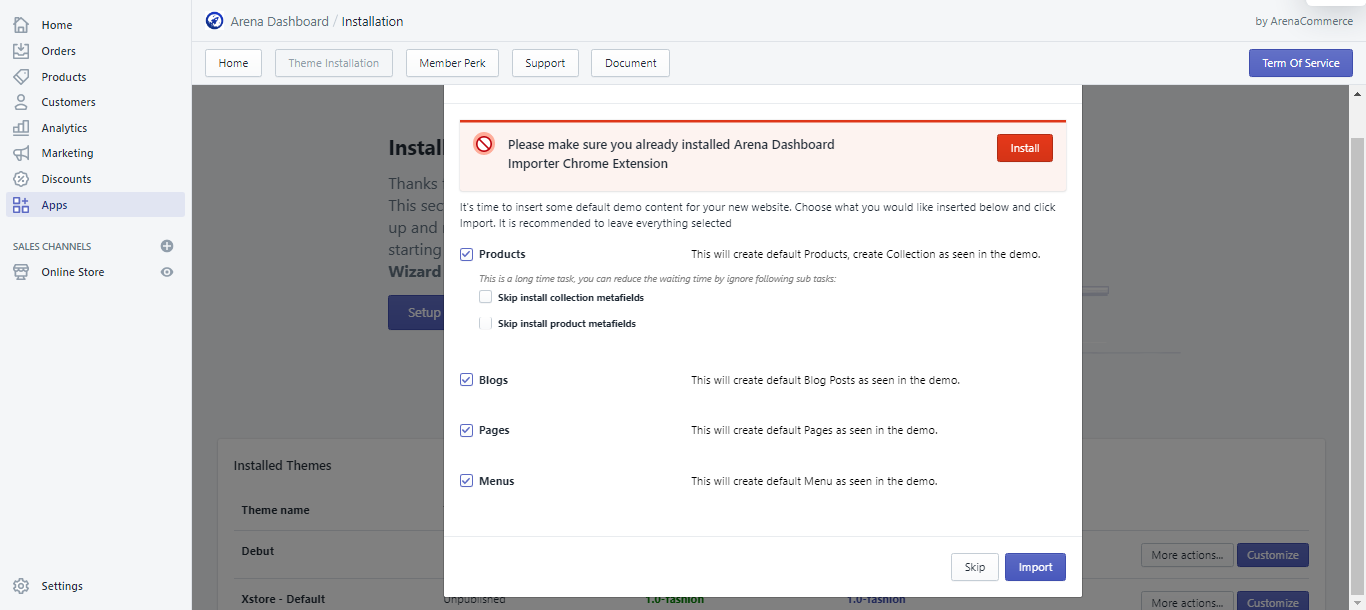
- When import task finish in this manner, just click
Skip. - Make sure you have installed and activated Arena Dashboard Importer Extension on Chrome. After that, when you click
Skip, the ‘Uploading sample files & images to your website’ dialogue box will appear. Please go to the next step to continue.
For the second posibility, the error screen will be as followed: 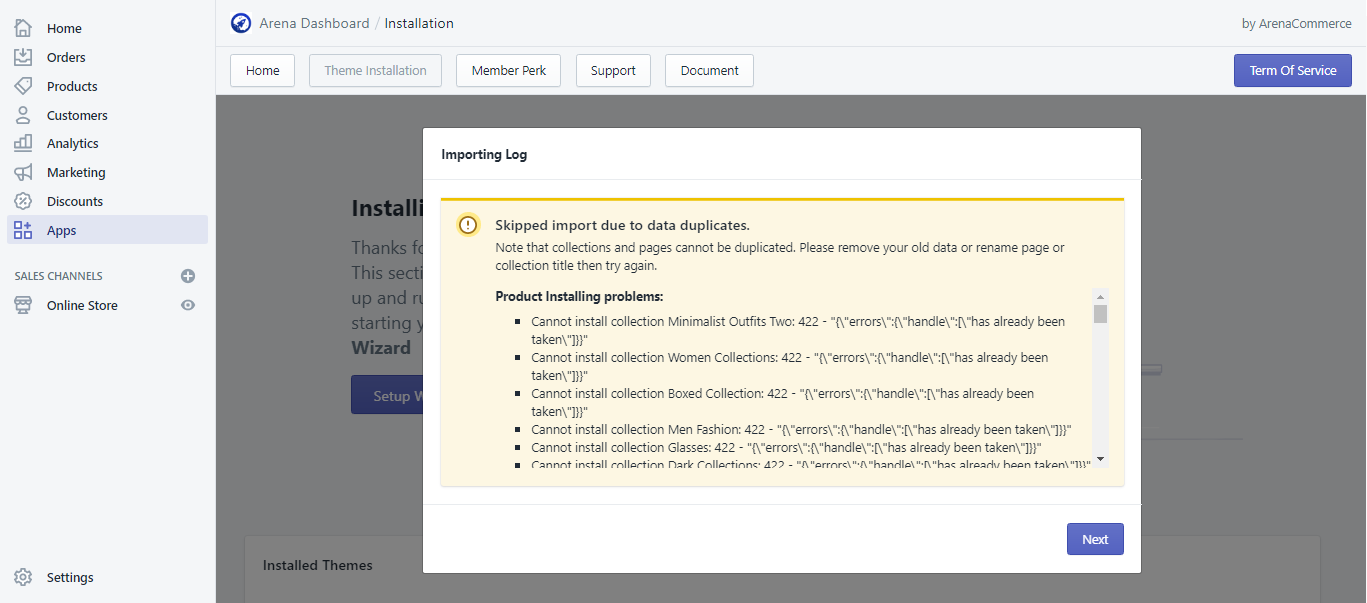
- When import task finish in this manner, just click
Next. The ‘Uploading sample files & images to your website’ dialogue box will appear. Please go to the next step to continue.
6. Upload sample images and files to your store
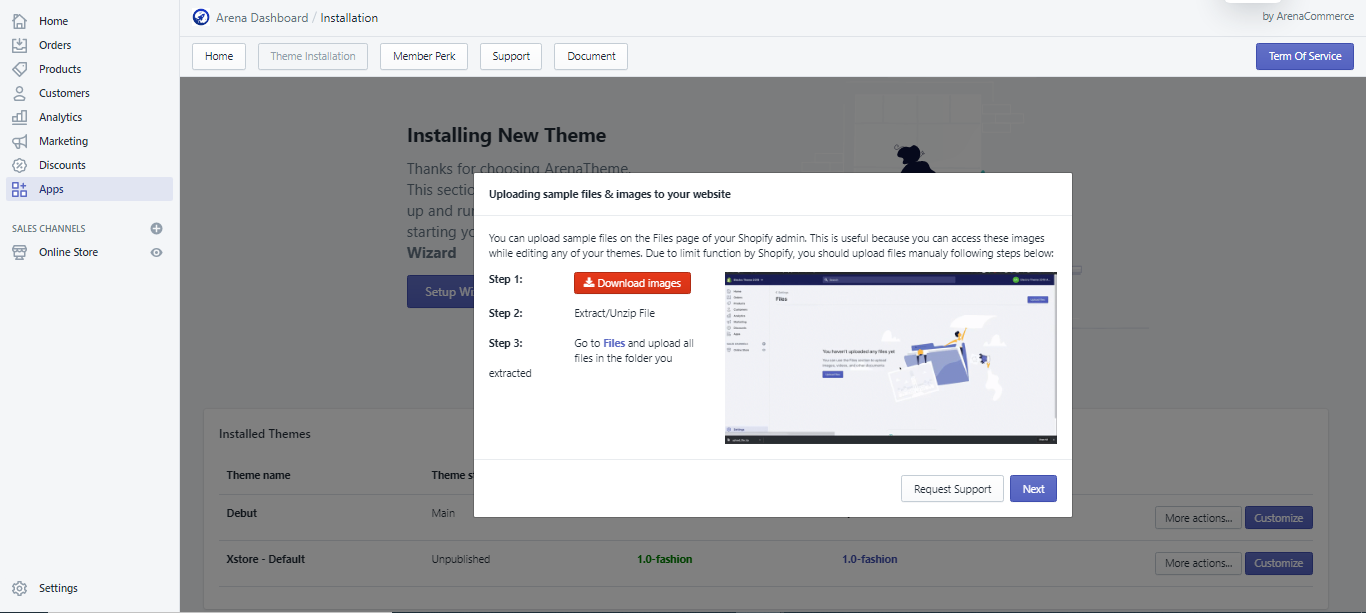
Click Download images.

Extract / Unzip the files. If you don’t know how to extract, please follow the link below for further details.
Read more: How to extract file.
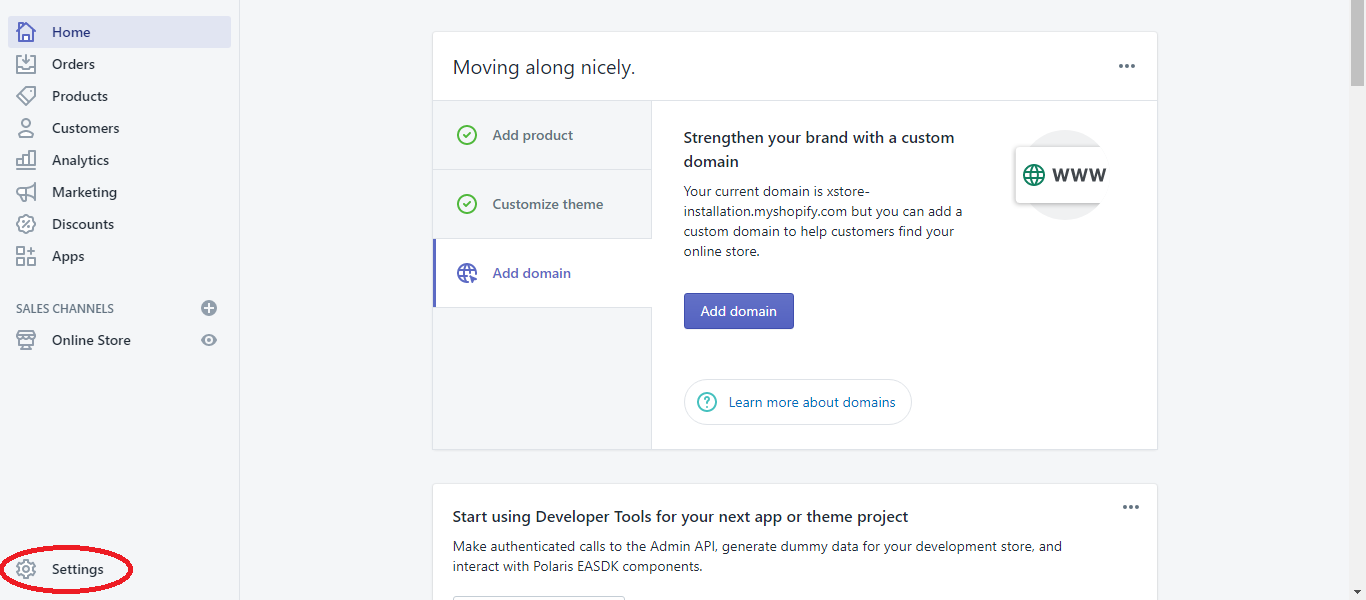
Go to Files in the Settings button locate at the lower left corner of the myShopify Admin Homepage.
Upload all files in the folder you have extracted. Then close the window.
How to upload files on to Shopify:
- From your Shopify admin, go to
Settings>Files. - Select all the files in the folder you have just extracted.
- Click
Upload files. - Select one or more files to upload. Click
Open.
- From your Shopify admin, go to
7. Integrating Shopify App into XStore theme
- You can choose to Install all the suggested apps into your Shopify at this point by clicking the
Installbutton on each app, or finish the theme installation process here by clicking theFinishbutton.
- The Integrating Shopify App details will be covered in the next article. You can access it by clicking here or scroll to the end of this page and click
Integrating Shopify Appat the lower right corner.
Step 5: Publishing Theme
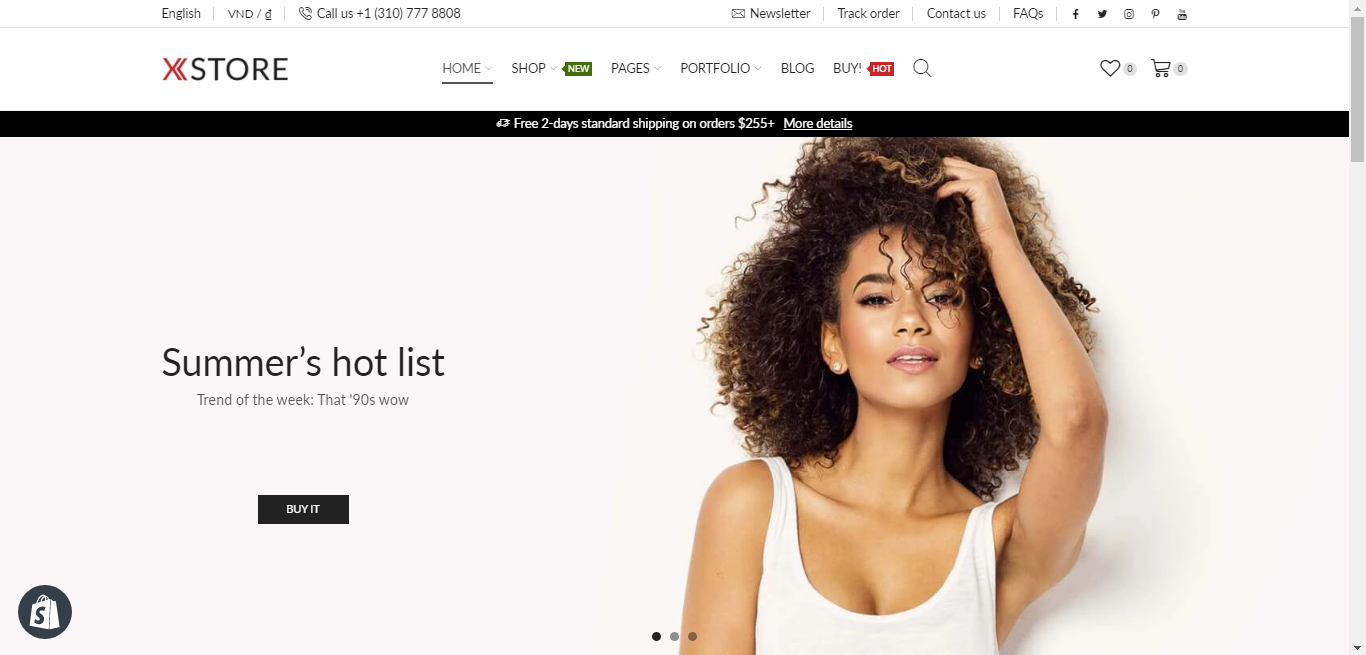
- Once the installation is finished, you can publish the theme to see first hand how it will play out on the web.
If you have installed the Demo Shop, the theme will now be lively with demo images to help you understand further the functions of each section. - If you have installed multiple XStore Demo Shops, the theme you choose to publish will be the one customers actually see when your store goes live.
- To publish a theme, simply go to the Arena Dashboard app in the
Appsection of your myShopify Admin Homepage > choose theTheme Installationtab > scroll down to the list ofInstalled Themes> ClickMore actions...button on the theme you want to publish > ClickPublish.
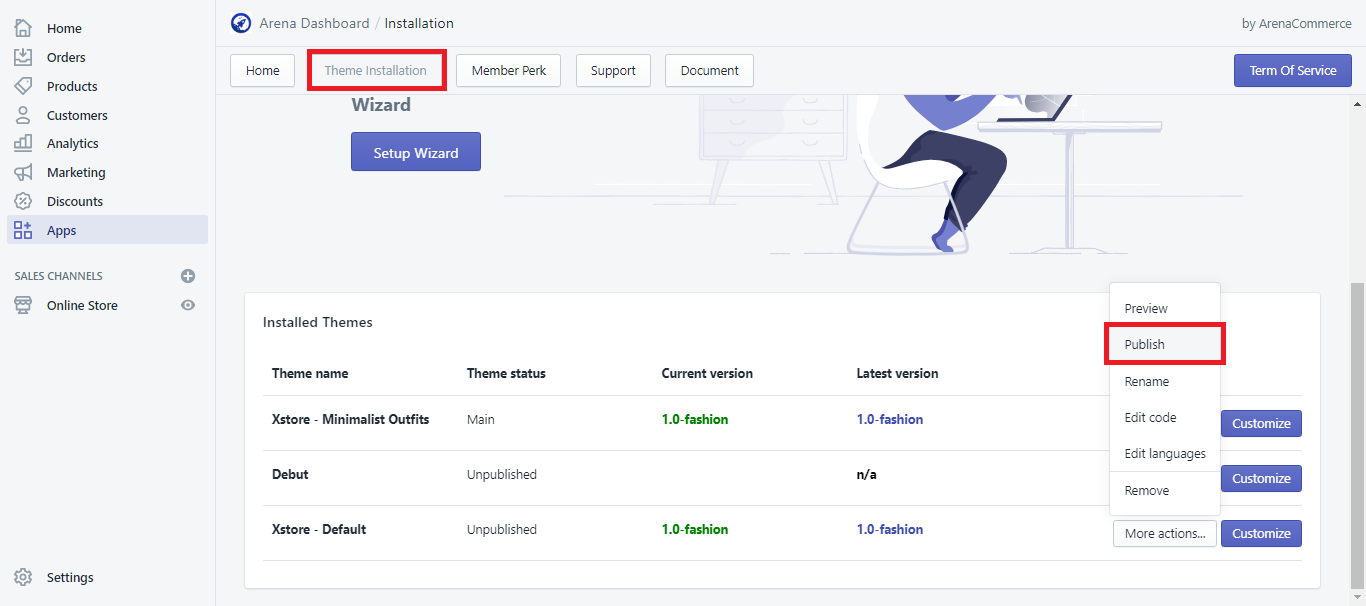
- After publishing the theme, you can view the theme in action on your domain [your chosen name].myshopify.com
In the next step, we will go through the installation and integration of useful Shopify apps that will help boost customer’s engagement and ease their buying process. You can access it by clicking here or click Integrating Shopify App at the lower right corner.